FEASTS AND FOTOS

  • Home
  • About
  • Happenings
  • Contact
You are here: Home / Archives for sweet

Candied Bacon

October 21, 2014 by Susan

Bacon2R

This post comes with a stern warning:  These.  Are.  Addicting.

At first glance, this idea of candied bacon might sound a bit strange to some of you.  Those that shy away from salty and sweet things mixed together might initially reject this (as did my husband).  But once you eat it you will see that the concept of sweetening up salty bacon is rather genius.  And you must try it.

Not only does this recipe sweeten up the bacon, but also adds a smoky element from the chili powder.  It is a wonderful mix of salty, smoky and sweet.  None of the flavors are too bold.

I have made this candied bacon several times and each and every time notice the same exact thing:  we can’t stop eating it. There is something about them (probably the fact that it’s BACON) that pulls me back to grab another one. Again and again.  And the next thing you know, the entire batch is gone.

When serving these I prefer to cut each strip of bacon in half.  I think it makes them easier to eat and makes you feel like you are eating more than you actually are (something I strive for when eating bacon).  Also, they are best served warm, not hot.  Once they cool down a bit the flavor really comes forward.

These strips of candied bacon will be a permanent addition to the menu at every get together I have.  Yes, they are a wonderful finger food to serve with appetizers, however, I’m sure leftovers (but you won’t have any) would be wonderful crumbled in a salad or placed in a sandwich.

Here’s what you will need to make approximately 16 slices of bacon…

Recipe

16 slices thin cut bacon

1/3 cup light brown sugar, tightly packed

1 tsp chili powder (heaping)

1/2 tsp cinnamon (heaping)

Method

Preheat oven to 400 degrees.

Line 2 large baking trays with two layers of tin foil.  Lay a cookie cooling rack in each baking tray.

Trim bacon of any excessive fat (mostly on the ends).

Mix brown sugar, chili powder and cinnamon in a small baking dish or tray with sides.  One at a time, lay bacon slice in spice mixture, pat down and sprinkle spices all over each piece of bacon.  Lay bacon on cooling racks.

Bake for approximately 15 – 17 minutes.  Remove from oven and allow bacon to cool on racks.  During cooling time, move each piece of bacon slightly once (with tongs) so they don’t stick to the rack.


Candied Bacon
 
Print
Author: Feasts And Fotos
Ingredients
  • 16 slices thin cut bacon
  • ⅓ cup light brown sugar, packed
  • 1 tsp chili powder
  • ½ tsp cinnamon
Method
  1. Preheat oven to 400 degrees.
  2. Line 2 large baking trays with two layers of tin foil.  Lay a cookie cooling rack in each baking tray.
  3. Trim bacon of any excessive fat (mostly on the ends).
  4. Mix brown sugar, chili powder and cinnamon in a small baking dish or tray with sides.  One at a time, lay bacon slice in spice mixture, pat down and sprinkle spices all over each piece of bacon.  Lay bacon on cooling racks.
  5. Bake for approximately 15 - 17 minutes.  Remove from oven and allow bacon to cool on racks.  During cooling time, move each piece of bacon slightly once (with tongs) so they don't stick to the rack.
3.2.2802

Filed Under: Appetizers, Snacks Tagged With: appetizer, bacon, candy, caramalized, chili powder, smokey, snacks, sweet

Strawberry Jam

September 30, 2014 by Susan

StrawberryJamFinalR

I am very into making jam lately.  Not the jam that requires all the sterilizing and sealing.  Although I would like to try that one day, that day is not today.  Or anytime soon.  It just seems rather daunting to me and alot of work.  I am all about  refrigerator jam, which basically means making a smaller batch and storing it in the refrigerator for up to a month instead of sterilizing and storing it on a shelf for longer periods of time.

This method of making jam is perfect for me.  First, I don’t want or need to make 15 jars of the same jam right now. Second, making smaller batches allows me the freedom to experiment with different fruits and spices and not be so committed to having a large quantity of one flavor in my pantry.

This is a basic, delicious strawberry jam recipe I have been going back to again and again.  I really love it.  It tastes fresh, bright and slightly sweet.  Most importantly, it truly tastes like strawberries!  It is sad to say many jams and jellies don’t actually taste like the fruit they are supposedly made from, instead tasting very processed and sugary.  Why is there so much sugar added?  I don’t think it needs it which is why I only put 3/4 of a cup in mine.  Let the fruit shine.

If you make this strawberry jam just store it in the fridge and consume it within 1 month.  Give one away to a good friend or family and keep the rest for yourself.  Trust me, you won’t have a problem finishing it all in time.  You will want to slather this on everything!

Here’s what you will need to make about 3 small jars…

Recipe

5 cups strawberries, washed, hulled and cut in half

3/4 cup sugar

2 Tbsp lemon juice, plus a few squeezes more

*2 teaspoons

Method

In a large non-reactive bowl add the strawberries, sugar and 2 Tbsp of lemon juice.  Mix to combine well.  Cover with plastic wrap and refrigerate overnight.

Remove plastic wrap and stir strawberry mixture.  Transfer to a large non-reactive pot and place pot over a medium heat.  Cook for 5 minutes, stirring occasionally, until all the sugar has melted and mixture begins to foam.

Place 2 teaspoons in the freezer.

Increase the heat to high and bring to a rolling boil, stirring almost constantly until thick and shiny, approximately 15 minutes.  Once you notice the jam starting to thicken (about 10 minutes in) add a few squeezes of fresh lemon juice to the pot.  Literally, only about 6-8 drops.

Place a small drop of jam on the back of one of the spoons and place the spoon back into the freezer for about 30 seconds. Remove spoon and tilt it.  The jam should just barely move.  If the jam slides down off the spoon easily continue cooking the jam for a few more minutes and then test again.

Allow mixture to cool slightly.  With an immersion blender puree 1/2 of the mixture until smooth, leaving the remaining slightly chunky.  If you want your jam completely smooth with no chunks at all, puree it all.

Allow to cool completely and fill your jars!  Store in refrigerator for up to one month.


Strawberry Jam
 
Print
Author: Feasts And Fotos
Ingredients
  • 5 cups strawberries, washed, hulled and cut in half
  • ¾ cup sugar
  • 2 Tbsp lemon juice, plus a few squeezes more
  • *2 teaspoons
Method
  1. In a large non-reactive bowl add the strawberries, sugar and 2 Tbsp of lemon juice.  Mix to combine well.  Cover with plastic wrap and refrigerate overnight.
  2. Remove plastic wrap and stir strawberry mixture.  Transfer to a large non-reactive pot and place pot over a medium heat.  Cook for 5 minutes, stirring occasionally, until all the sugar has melted and mixture begins to foam.
  3. Place 2 teaspoons in the freezer.
  4. Increase the heat to high and bring to a rolling boil, stirring almost constantly until thick and shiny, approximately 15 minutes.  Once you notice the jam starting to thicken (about 10 minutes in) add a few squeezes of fresh lemon juice to the pot.  Literally, only about 6-8 drops.
  5. Place a small drop of jam on the back of one of the spoons and place the spoon back into the freezer for about 30 seconds. Remove spoon and tilt it.  The jam should just barely move.  If the jam slides down off the spoon easily continue cooking the jam for a few more minutes and then test again.
  6. Allow mixture to cool slightly.  With an immersion blender puree ½ of the mixture until smooth, leaving the remaining slightly chunky.  If you want your jam completely smooth with no chunks at all, puree it all.
  7. Allow to cool completely and fill your jars!  Store in refrigerator for up to one month.
3.2.2802

Filed Under: Breakfast, Sweets Tagged With: jam, low sugar, refrigerator, strawberry, sweet

Blueberry Buttermilk Scones

June 23, 2009 by Susan

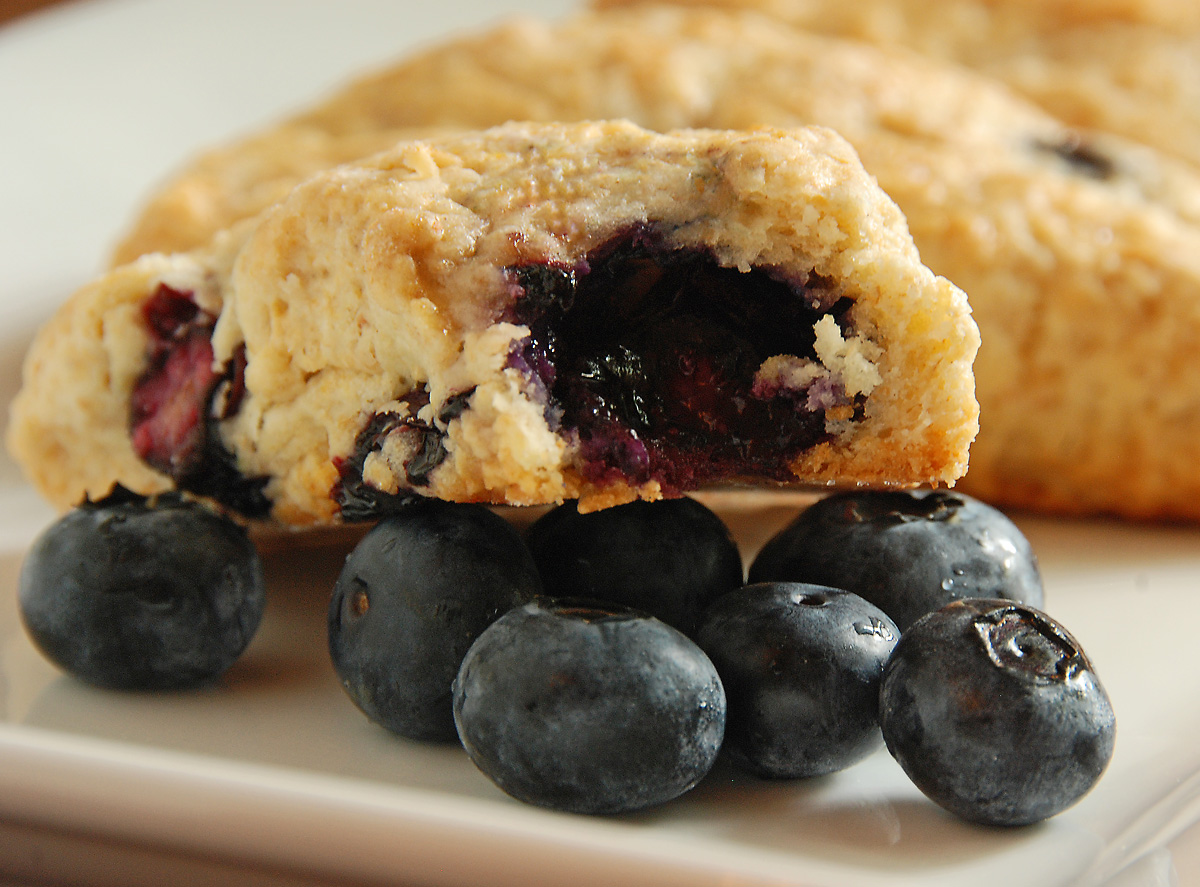
BlueberrySconeBerries

Dear lord these are delicious.

If I ever happen to be in a bakery (I try to avoid them due to my occassional lack of self control) I rarely ever choose scones.  I think the few times in my life that I’ve ever even eaten a scone I remember it to be very crumbly and dry.  Sort of like a brick.  Who would pay money for these things??  As far as I was concerned, I would rather have a muffin or croissant any day.

Then along comes Martha Stewart and her blueberry buttermilk scones.  I can’t say enough about these things.  They are spectacular!   So this is what a scone is supposed to taste like!   Ah ha!

The aroma while baking these is intoxicating.  The end product was slightly crumbly on the outside, soft and tender on the inside.  And that burst of blueberries adds a wonderful natural sweetness.  I love blueberries, they are sweet and delicious and are perfect to snack on.  Perfect size to just pop into your mouth.  It’s just an added bonus that they are very healthy and full of antioxidants.

After preparing the dough, I cut the scones a bit smaller (more narrow) than normal,  figuring it would be better on my waistline to eat smaller portions.  What a joke.  These were so good I ate TWO of the smaller scones.  See what I mean about the self control?  I baked off a few the first day reserving part of the dough in the fridge until the next day.  They came out just as yummy.  Also, leftover scones are delicious reheated in a toaster oven for a few minutes until warmed through.

I did make a few slight changes to the recipe.  I used whole wheat flour in place of cake flour and I used less sugar (as I usually do).  I used regular buttermilk, not low-fat.  Not sure they sell a low fat version where I shop.  Lastly, I added the lemon zest.

Here’s what you will need to make 10-12 scones….

Recipe

1 1/2 cups all purpose flour

1/2 cup whole wheat flour

1 1/2 tablespoon granulated sugar

2 1/2 tsp baking powder

3/4 tsp salt

4 ounces (1 stick) cold unsalted butter, cut into small pieces

1 heaping cup fresh blueberries

zest of one small lemon

1/2 cup buttermilk

1 large egg, plus 1 large egg lightly beaten for egg wash

1/2 teaspoon pure vanilla extract

fine sugar for sprinkling

Method

Preheat oven to 375 degrees.  Line a baking sheet with parchment paper.

Whisk together flours, granulated sugar, baking powder and salt in a large bowl.  Add butter and rub with your fingers until mixture has the texture of course meal.  Gently stir in blueberries.

In another bowl whisk together buttermilk, 1 egg , lemon zest and vanilla.  Drizzle over flour mixture and stir lightly with a fork until the dough comes together but a small amount of flour remains in bowl.  It’s important to not overwork the dough.

Turn out dough onto work surface and gently knead dough once or twice just to incorporate the flour.  Pat the dough into a 1-inch thick round.  Cut the round into approximately 10-12 wedges.  Transfer to baking sheet.

Brush the top of each scone with egg wash and sprinkle generously with sugar.  Bake until golden brown and cooked through, roughly 25 minutes.  Transfer scones to a wire rack to cool.

Just try to control yourself – you will be tempted to eat these piping hot out of the oven!  Use restraint until they are cool enough so you don’t burn your mouth.

Blueberry Buttermilk Scones
 
Print
Author: Feasts And Fotos
Ingredients
  • 1½ cups all purpose flour
  • ½ cup whole wheat flour
  • 1½ tablespoon granulated sugar
  • 2½ tsp baking powder
  • ¾ tsp salt
  • 4 ounces (1 stick) cold unsalted butter, cut into small pieces
  • 1 heaping cup fresh blueberries
  • zest of one small lemon
  • ½ cup buttermilk
  • 1 large egg, plus 1 large egg lightly beaten for egg wash
  • ½ teaspoon pure vanilla extract
  • fine sugar for sprinkling
Method
  1. Preheat oven to 375 degrees.  Line a baking sheet with parchment paper.
  2. Whisk together flours, granulated sugar, baking powder and salt in a large bowl.  Add butter and rub with your fingers until mixture has the texture of course meal.  Gently stir in blueberries.
  3. In another bowl whisk together buttermilk, 1 egg , lemon zest and vanilla.  Drizzle over flour mixture and stir lightly with a fork until the dough comes together but a small amount of flour remains in bowl.  It's important to not overwork the dough.
  4. Turn out dough onto work surface and gently knead dough once or twice just to incorporate the flour.  Pat the dough into a 1-inch thick round.  Cut the round into approximately 10-12 wedges.  Transfer to baking sheet.
  5. Brush the top of each scone with egg wash and sprinkle generously with sugar.  Bake until golden brown and cooked through, roughly 25 minutes.  Transfer scones to a wire rack to cool.
3.2.2802

Filed Under: Breakfast, Sweets Tagged With: blueberry, breakfast, buttermilk, dessert, scone, sweet

Hello and welcome to Feasts and Fotos!

Archives

Categories

Copyright © 2025 · Foodie Pro Theme by Shay Bocks · Built on the Genesis Framework · Powered by WordPress