FEASTS AND FOTOS

  • Home
  • About
  • Happenings
  • Contact
You are here: Home / Archives for dinner

Crock Pot Mexican Shredded Chicken

March 24, 2015 by Susan

MexicanShreddedChicken2R

My crock pot has been in a box, in my storage room, for years.  More years than I care to admit, really.  My issue with crock pots is this: if I have to pre-cook, or brown, meat prior to putting it into the crock pot then I might as well just cook the meal on the stove top or in the oven.  After all, I’ve already dirtied a pot.  For me, the only way I can get excited about using the crock pot is if there is zero ‘cooking’ prior.

It was this recipe that got me to unearth my crock pot and get on the bandwagon.  No prepping the meat at all beforehand, simply dump all the ingredients into the pot, turn it on and walk away.  It was great!  I absolutely loved having dinner cooking while I was busy doing other things all day long.  I suppose that’s the beauty of using a slow cooker, right?

I made quite a bit of changes to the original recipe from Skinnytaste.  I liked the idea of the recipe, and I did like the original recipe, but for me it was lacking a little something.  A few ideas immediately came to mind the first time I made it, and over the next few times I prepared this meal I perfected each change.  It is now exactly how we like it. The main changes I made are overall more spices, the addition of the poblano pepper and adding the frozen peas and corn at the very end, giving just enough time for them to thaw out.  I like my frozen veggies to still have their bright colors and a bit of a snap to them.  I always serve this dish over white long-grain rice, it really soaks up all the liquid nicely.  But I’m sure it would be perfect with brown rice too.

Other than the flavor, my favorite thing about this meal is the amount of leftovers.  This recipe makes a large amount and holds well in the fridge for at least 3-4 days.  When I make this, we usually eat it again for dinner once during the week, but also several times for lunch.  Sometimes, after I shred the chicken but before I add it back to the pot, I set some dry shredded chicken aside and use it in wraps the following day.  Delicious!

If your crock pot is in storage maybe this recipe will encourage you to dig it out. I really like crock pot cooking now and look forward to trying another recipe soon. Suggestions are welcome!

Here’s what you will need to serve 8-10….

Recipe

4 medium chicken breasts, boneless, skinless

1 large poblano pepper, diced (or one green pepper & one jalapeño, seeds and ribs mostly removed)

2-10 oz cans diced tomatoes with mild green chilies

15 oz can black beans, drained and rinsed

20 oz low sodium chicken stock

1 bunch scallions, chopped and divided in half

1 tsp garlic powder

1 tsp onion powder

1 tsp cumin (plus some more for sprinkling)

1 tsp coriander (plus some more for sprinkling)

1 tsp chili powder (plus some more for sprinkling)

1 tsp cayenne pepper

1 cup frozen corn

1 cup frozen peas

1/2 lime, juiced

1/2 bunch of cilantro

salt & pepper to taste

your favorite rice, cooked

Method

Lay chicken breasts in a shallow baking dish.  Sprinkle both sides with some cumin, coriander, chili powder, salt & pepper.  Set aside.

To the bowl of a crock pot combine chicken stock,  black beans, diced tomatoes, 1/2 the chopped scallions, poblano pepper, garlic & onion powder, cumin, coriander, chili and cayenne.  Stir to combine.  Lay chicken breasts on top of mixture, cover and turn the crock pot on for 6 hours.

Once the crock pot turns off (or just before), remove all the chicken breasts and shred (use 2 forks).  Return all the shredded chicken back to the pot, add in the remaining scallions, frozen corn & peas and most of the cilantro.  Stir to combine.  Put the cover back on and allow to sit for about 15 minutes.  Just before serving add the juice of 1/2 lime, stir and portion into bowls, on top of rice.  Sprinkle with cilantro and serve.

Original recipe: http://www.skinnytaste.com/2009/02/crock-pot-santa-fe-chicken-425-pts.html 


Mexican Shredded Chicken
 
Print
Author: Feasts And Fotos
Ingredients
  • 4 medium chicken breasts, boneless, skinless
  • 1 large poblano pepper, diced (or one green pepper & one jalapeño, seeds and ribs mostly removed)
  • 2-10 oz cans diced tomatoes with mild green chilies
  • 15 oz can black beans, drained and rinsed
  • 20 oz low sodium chicken stock
  • 1 bunch scallions, chopped and divided in half
  • 1 tsp garlic powder
  • 1 tsp onion powder
  • 1 tsp cumin (plus some more for sprinkling)
  • 1 tsp coriander (plus some more for sprinkling)
  • 1 tsp chili powder (plus some more for sprinkling)
  • 1 tsp cayenne pepper
  • 1 cup frozen corn
  • 1 cup frozen peas
  • ½ lime, juiced
  • ½ bunch of cilantro
  • salt & pepper to taste
  • your favorite rice, cooked
Method
  1. Lay chicken breasts in a shallow baking dish. Sprinkle both sides with some cumin, coriander, chili powder, salt & pepper. Set aside.
  2. To the bowl of a crock pot combine black beans, diced tomatoes, ½ the chopped scallions, poblano pepper, garlic & onion powder, cumin, coriander, chili and cayenne. Stir to combine. Lay chicken breasts on top of mixture, cover and turn the crock pot on for 6 hours.
  3. Once the crock pot turns off (or just before), remove all the chicken breasts and shred (use 2 forks). Return all the shredded chicken back to the pot, add in the remaining scallions, frozen corn & peas and most of the cilantro. Stir to combine. Put the cover back on and allow to sit for about 15 minutes. Just before serving add the juice of ½ lime, stir and portion into bowls, on top of rice. Sprinkle with cilantro and serve.
3.2.2929

Filed Under: Main Dishes, Uncategorized Tagged With: black beans, chicken, chili, cumin, dinner, healthy, lunch, mexican, poblano, shredded

Chicken Tenders with Honey Mustard Sauce

January 28, 2015 by Susan

ChickenTenders3R

The big game is this weekend and that means we get to eat things this Sunday that we normally would not.  Right?  Cheesy dips. Sticky, gooey chicken wings. Let’s do it!

Ok, so if you are not willing to let this Sunday be a huge ‘cheat day’ from your regular eating pattern you can make these chicken tenders.  You might think they would be bad for you, but they are not.  There is no egg and flour or frying involved.  Just some buttermilk, breadcrumbs and cheese.  And they are baked! Even though they are not fried, they still are slightly crunchy on the outside and tender and juicy on the inside.

These chicken tenders would make a wonderful appetizer but, truthfully, we often eat these as a meal. The preparation is quick and easy and if you pair it with a cup or bowl of soup (which we do) you will be satisfied.  Depending on the size of the tenders, of course.  Most of the time the tenders are quite large so eating 4-5 each is usually enough.  I love honey mustard sauce for these (a little more honey tasting than mustard), however, feel free to use your favorite sauce.  We sometimes use BBQ sauce.

Although I am not a huge follower of football during the season, I do love watching the Superbowl.  Mostly for the commercials and the half-time entertainment.  This year I don’t think I’m going to go crazy with all the fried food and cheesy goodness. Instead, I am going to make these.  I’ll feel better about things and I won’t have to log in extra time on the elliptical machine.  And that is always a good thing!

Here’s what you will need to make approximately 15 tenders…

Recipe

1-2 packages chicken tenders

buttermilk

1/2 cup panko, mounded

1/2 cup Italian Seasoned Breadcrumbs, mounded

1/3 cup grated Parmigiano-Reggiano cheese

salt & pepper to taste

Honey Mustard Sauce

3 Tbsp honey

2 Tbsp mustard

1/2 tsp mayo

lemon juice (about 10 drops)

salt & pepper to taste

Method

In a medium bowl add the chicken tenders and enough buttermilk to cover all the chicken.  Allow to marinate in the refrigerator for at least one hour, preferably 4-5 hours.

Preheat oven to 500 degrees.

In a flat, rimmed pan add the panko, seasoned breadcrumbs, cheese, salt & pepper.  Mix with your fingers until ingredients are fully incorporated.

Line a large baking sheet with parchment paper.  Spray parchment paper with cooking spray.

Once the chicken is done marinating, remove from refrigerator.  Take one tender at a time, drain off some of the buttermilk and dredge it in the bread crumb mixture.  I use tongs for this and I usually pat down the breadcrumbs on each side.  Lift out of the breadcrumb mixture and gently shake off any excess. Lay on the baking sheet.  Continue with all the tenders.

Once you have all the tenders lined up drizzle a touch of olive oil over each one. Place in the oven for approximately 15-17 minutes total, flipping over when the bottoms are starting to turn golden (after about 8-10 minutes or so).  I usually don’t cook the 2nd side for as long as the first side.

Meanwhile, prepare the honey mustard sauce by simply adding all ingredients to a small bowl and mixing well.  Set aside.

Allow tenders to cool slightly (they will be piping hot!) and serve with the honey mustard sauce for dipping.

Recipe adapted from Giada De Laurentiis


Chicken Tenders with Honey Mustard Sauce
 
Print
Author: Feasts And Fotos
Ingredients
  • 1-2 packages chicken tenders
  • buttermilk
  • ½ cup panko, mounded
  • ½ cup Italian Seasoned Breadcrumbs, mounded
  • ⅓ cup grated Parmigiano-Reggiano cheese
  • salt & pepper to taste
  • Honey Mustard Sauce
  • 3 Tbsp honey
  • 2 Tbsp mustard
  • ½ tsp mayo
  • lemon juice (about 10 drops)
  • salt & pepper to taste
Method
  1. In a medium bowl add the chicken tenders and enough buttermilk to cover all the chicken. Allow to marinate in the refrigerator for at least one hour, preferably 4-5 hours.
  2. Preheat oven to 500 degrees.
  3. In a flat, rimmed pan add the panko, seasoned breadcrumbs, cheese, salt & pepper. Mix with your fingers until ingredients are fully incorporated.
  4. Line a large baking sheet with parchment paper. Spray parchment paper with cooking spray.
  5. Once the chicken is done marinating, remove from refrigerator. Take one tender at a time, drain off some of the buttermilk and dredge it in the bread crumb mixture. I use tongs for this and I usually pat down the breadcrumbs on each side. Lift out of the breadcrumb mixture and gently shake off any excess. Lay on the baking sheet. Continue with all the tenders.
  6. Once you have all the tenders lined up drizzle a touch of olive oil over each one. Place in the oven for approximately 15-17 minutes total, flipping over when the bottoms are starting to turn golden (after about 8-10 minutes or so). I usually don't cook the 2nd side for as long as the first side.
  7. Meanwhile, prepare the honey mustard sauce by simply adding all ingredients to a small bowl and mixing well. Set aside.
3.2.2802

Filed Under: Appetizers, Main Dishes Tagged With: appetizer, baked, breadcrumbs, chicken, dinner, honey, lunch, mustard, panko, sauce, tenders

Roasted Vegetable Soup

January 12, 2015 by Susan

RoastedVegetableSoupR

Most soups I make are prepared using the same method; sauteing onions, garlic and veggies in a pot on the stove and then adding stock and simmering away.  This soup turns that method upside down!  I loved the concept and it sounded so easy.  Naturally, I thought, could it actually be good?

Oh yeah!  So good.  I am already a huge fan of oven roasting vegetables to eat as a side dish. Favorites are broccoli, cauliflower and carrots.  I feel roasting the vegetables really brings out their flavor, so much more than, let’s say, steaming.

The other element that I love about this soup is that it includes eggplant. Eggplant!  I haven’t come across many soup recipes with eggplant in them, have you?  To be honest, you would be hard pressed to detect the eggplant in here.  All the flavors of the vegetables blend well and are so delicious.  Even the sage, it’s there in the background, not overpowering at all.  The sage I used to make this particular pot of soup came from my garden, still going strong in December!  It is a hearty herb, that sage.

I am happy to report that this soup recipe is quite forgiving.  I think if you stick to the base vegetables (eggplant, carrots, potatoes) you can add some others (celery, parsnips) and it would be just as great.  Making this recipe would be a great way to clear out your fridge of any root veggies that might be slightly past their prime.  You can also comfortably make some substitutions. Don’t have shallots?  Add an onion instead.  Want this soup to be vegetarian?  Use vegetable stock instead of chicken stock. Prefer it to be a touch thinner?  Add more stock.  Forgiving is good.

This roasted vegetable soup is very delicious and super comforting on a cold, snowy day (we’ve already had quite a few in the NY area).  It is very thick, so it is filling and perfect on its own for a lunch or light dinner.  And thick enough that my 3-year-old can feed herself this soup, which she loves.

Add a slice of toasted rustic bread to dip and you will be in heaven.

Here’s what you will need to serve 6-8…

Recipe

3-4 tbsp olive oil

1 large eggplant, peeled and chopped into 2 inch cubes

3 carrots, sliced into 1 inch pieces

3 large shallots, quartered

6 cloves garlic, whole

2 large Idaho potatoes, peeled and chopped into 1 inch chunks

6 cups chicken stock (or vegetable stock)

3 large sage leaves

sea salt & pepper, to taste

Method

Preheat oven to 375 degrees.

Oil the bottom of a large, rimmed sheet pan with 1 tbsp of oil (rub it around with your fingers to coat) and add everything except the sage leaves.  Add 2-3 tbsp of olive oil, salt & pepper and toss to coat.  Arrange in a single layer.

Roast for 45 minutes, flipping vegetables once or twice, ensuring they brown slightly but do not burn.  Remove pan from oven, add sage leaves on top of veggies on one side of the pan, and then pile the remaining veggies on top of the sage leaves.  The heat from the veggies will wilt the sage.  Allow to cool slightly.

In a high powered blender, add vegetables and broth in manageable batches.  Pour into a large pot, heat slightly and serve or store in the fridge for up to 4-5 days.

Recipe adapted from Clean Eating Magazine


Roasted Vegetable Soup
 
Print
Author: Feasts And Fotos
Ingredients
  • 3-4 tbsp olive oil
  • 1 large eggplant, peeled and chopped into 2 inch cubes
  • 3 carrots, sliced into 1 inch pieces
  • 3 large shallots, quartered
  • 6 cloves garlic, whole
  • 2 large Idaho potatoes, peeled and chopped into 1 inch chuncks
  • 6 cups chicken stock (or vegetable stock)
  • 3 large sage leaves
  • sea salt & pepper, to taste
Method
  1. Preheat oven to 375 degrees.
  2. Oil the bottom of a large, rimmed sheet pan with 1 tbsp of oil (rub it around with your fingers to coat) and add everything except the sage leaves. Add 2-3 tbsp of olive oil, salt & pepper and toss to coat. Arrange in a single layer.
  3. Roast for 45 minutes, flipping vegetables once or twice, ensuring they brown slightly but do not burn. Remove pan from oven, add sage leaves on top of veggies on one side of the pan, and then pile the remaining veggies on top of the sage leaves. The heat from the veggies will wilt the sage. Allow to cool slightly.
  4. In a high powered blender, add vegetables and broth in manageable batches. Pour into a large pot, heat slightly and serve or store in the fridge for up to 4-5 days.
3.2.2802

Filed Under: Soup Tagged With: carrots, comfort food, dinner, eggplant, healthy, lunch, potatoes, roasted, sage, soup, vegetable

Chicken Madison

December 14, 2011 by Susan

ChickenMadisonR

A few years ago, while my husband and I were planning our wedding, we went out for dinner near the reception hall we had just chosen for our wedding day.  We both ordered the same chicken entrée because it sounded so delicious.  And it was.  We loved it so much that as I was eating it I thought…I’m going to try to recreate this dish at home.  How hard can it be?

Well, here’s the dish.  And I must say, it’s pretty darn close to the original one we had at the restaurant that night – minus the tons of butter I’m sure they put in it.  It has turned out to be one of our favorite meals.  I named this dish after the town the restaurant is in and every time I make it we are reminded of our wedding and all the planning that went into it.

Hopefully by following this recipe you will have extra sauce leftover once you have eaten all the chicken.  Absolutely do not throw that sauce away.  It is utterly spectacular over pasta.

Here’s what you will need to serve 4….

Recipe

6 thin chicken cutlets (they come butterflied in my store, I usually cut them in 1/2 down the center).

whole wheat flour

4 cloves garlic, smashed

2 garlic cloves, minced

1 box crimini mushrooms, cleaned and sliced (not too thin)

1 12 oz bag of frozen artichoke hearts, slightly defrosted, cut in half lengthwise

1 Tbsp tomato paste

1  7 ounce jar of sun dried tomatoes, drained and sliced, 2-3 tbsp of oil reserved

1/2 – 3/4 cup white wine

3/4 – 1 cup chicken stock, low sodium

1 tsp fresh thyme, chopped

1/3 cup fresh parsley, chopped

Salt & Pepper

Olive oil

1 Tbsp butter, optional

Method

Heat a few tablespoons of olive oil in a large skillet over medium heat.  Add 2 smashed garlic cloves, to season the oil.  Season chicken with salt & pepper and coat in the flour, tapping off excess.  Add some of the chicken to oil, being sure not to overcrowd the pan, cooking them until golden brown on each side.  Remove from skillet and transfer to a plate.  Be careful to watch the cloves of garlic and be sure to remove them once they appear to be getting too golden.  You don’t want them to burn.  Repeat with remaining chicken and smashed garlic.

In the same skillet you just cooked all the chicken in add the oil you reserved from the sun dried tomatoes.  Into that oil add the artichoke hearts and cook, stirring occasionally, for 3-4 minutes.  To the artichokes add the sliced mushrooms and cook for 3-4 minutes, or until they start to soften a bit.  Next, add the tomato paste and garlic and stir into the vegetables, cooking for 2-3 minutes.  At this point I usually add some salt and pepper.  Next comes the liquids…add the wine first, allowing it to simmer for a few minutes.  Finally add the chicken stock and the fresh thyme.  Allow liquids to simmer together for 4-5 minutes.  To thicken this liquid mixture a bit, add approximately 1-2 tablespoons of the leftover whole wheat flour to the skillet, whisking to mix.

Add the chicken cutlets back into the skillet, nestling them all in under the veggies, gently, as best as you can.  Ideally you want most of the chicken to be submerged into the liquid.  It is ok if the tops of a few pieces are not submerged.  If you feel you need a bit more liquid, add some more chicken stock.  Put a cover on the skillet, lower heat to low and gently simmer for 15 – 20 minutes, or until the chicken is cooked through.  Once cooked, turn off heat and add the parsley.  If you so choose, you can also add the butter, just to finish the sauce a bit.  A little tablespoon of butter won’t hurt!

I always serve this over a creamy white bean puree (recipe coming soon!).  However, it would be equally as delicious served over mashed potatoes or white rice.

Chicken Madison
 
Print
Author: Feasts And Fotos
Ingredients
  • 6 thin chicken cutlets (they come butterflied in my store, I usually cut them in ½ down the center).
  • whole wheat flour
  • 4 cloves garlic, smashed
  • 2 garlic cloves, minced
  • 1 box crimini mushrooms, cleaned and sliced (not too thin)
  • 1 12 oz bag of frozen artichoke hearts, slightly defrosted, cut in half lengthwise
  • 1 Tbsp tomato paste
  • 1  7 ounce jar of sun dried tomatoes, drained and sliced, 2-3 tbsp of oil reserved
  • ½ - ¾ cup white wine
  • ¾ - 1 cup chicken stock, low sodium
  • 1 tsp fresh thyme, chopped
  • ⅓ cup fresh parsley, chopped
  • Salt & Pepper
  • Olive oil
  • 1 Tbsp butter, optional
Method
  1. Heat a few tablespoons of olive oil in a large skillet over medium heat.  Add 2 smashed garlic cloves, to season the oil.  Season chicken with salt & pepper and coat in the flour, tapping off excess.  Add some of the chicken to oil, being sure not to overcrowd the pan, cooking them until golden brown on each side.  Remove from skillet and transfer to a plate.  Be careful to watch the cloves of garlic and be sure to remove them once they appear to be getting too golden.  You don't want them to burn.  Repeat with remaining chicken and smashed garlic.
  2. In the same skillet you just cooked all the chicken in add the oil you reserved from the sun dried tomatoes.  Into that oil add the artichoke hearts and cook, stirring occasionally, for 3-4 minutes.  To the artichokes add the sliced mushrooms and cook for 3-4 minutes, or until they start to soften a bit.  Next, add the tomato paste and garlic and stir into the vegetables, cooking for 2-3 minutes.  At this point I usually add some salt and pepper.  Next comes the liquids...add the wine first, allowing it to simmer for a few minutes.  Finally add the chicken stock and the fresh thyme.  Allow liquids to simmer together for 4-5 minutes.  To thicken this liquid mixture a bit, add approximately 1-2 tablespoons of the leftover whole wheat flour to the skillet, whisking to mix.
  3. Add the chicken cutlets back into the skillet, nestling them all in under the veggies, gently, as best as you can.  Ideally you want most of the chicken to be submerged into the liquid.  It is ok if the tops of a few pieces are not submerged.  If you feel you need a bit more liquid, add some more chicken stock.  Put a cover on the skillet, lower heat to low and gently simmer for 15 - 20 minutes, or until the chicken is cooked through.  Once cooked, turn off heat and add the parsley.  If you so choose, you can also add the butter, just to finish the sauce a bit.
3.2.2802

Filed Under: Main Dishes Tagged With: artichoke hearts, chicken, dinner, mushrooms, sun-dried tomatoes

Beef Barley Soup

October 28, 2011 by Susan

BeefBarleySoupRThat winter chill is back in the air.  And that could only mean one thing – soup time!

I love soups, particularly hearty ones and am constantly on the lookout for a new soup to add to my winter-soup-rotation.  This one has made the cut.  It’s a cross between a soup and a stew, actually.  A complete meal in a bowl.  The barley really thickens up the soup.  One time I was a little short on barley so I added in some cooked quinoa that I had leftover in the fridge.  It was wonderful.

I adapted this recipe from Martha Stewart.  I’ve already made it a few times and tweaked it to my liking, adding more meat and mushrooms than originally called for and completely introducing thyme (always goes great with mushrooms) and peas.  I hope you love my version as much as we do!

Here’s what you will need to serve 6…

Recipe

2 tbsp olive oil

2 pounds beef chuck, cut into 3/4 inch cubes

1 large onion, chopped

1 large carrot, chopped

1 package crimini mushrooms, sliced

1 package shiitake mushrooms, sliced

2 tbsp garlic, minced (approx 4 cloves)

1 tsp chopped thyme

2 tbsp tomato paste

3/4 cup dry red wine

4 cups chicken stock, low sodium

2 1/2 cups water

3/4 cup barley

1/2 cup frozen peas

1/4 cup parsley, chopped

salt & pepper

Method

Heat olive oil in a large heavy pot or dutch oven over medium heat.  Season beef cubes with salt & pepper and brown on all sides.  For 2 pounds of meat I usually do this in 2 batches so I don’t overcrowd the pan.  Transfer meat to a plate and set aside.

Reduce heat slightly and add a touch more olive oil if needed.  Add onion and carrots to the pot and cook for 2-3 minutes.  Add the mushrooms, stirring occasionally, and cook until veggies have softened, approximately 10 minutes.

Add garlic, thyme, tomato paste and cook for 3-4 minutes.  Add wine and bring to a boil, scraping up any brown bits on the bottom of the pot.  Cook until reduced by half, 4-5 minutes.

Return beef to the pot.  Add the chicken stock and water.  Bring to a boil, reduce heat to low and simmer, covered for 1 hour, stirring occasionally.

After 1 hour add the barley to the pot and continue to cook, covered, for 30 – 40 minutes, or until barley is tender.  Add frozen peas for the last 2-3 minutes of cooking.  Turn off heat, stir in parsley and serve.

Beef Barley Soup
 
Print
Author: Feasts And Fotos
Ingredients
  • 2 tbsp olive oil
  • 2 pounds beef chuck, cut into ¾ inch cubes
  • 1 large onion, chopped
  • 1 large carrot, chopped
  • 1 package crimini mushrooms, sliced
  • 1 package shiitake mushrooms, sliced
  • 2 tbsp garlic, minced (approx 4 cloves)
  • 1 tsp chopped thyme
  • 2 tbsp tomato paste
  • ¾ cup dry red wine
  • 4 cups chicken stock, low sodium
  • 2½ cups water
  • ¾ cup barley
  • ½ cup frozen peas
  • ¼ cup parsley, chopped
  • salt & pepper
Method
  1. Heat olive oil in a large heavy pot or dutch oven over medium heat.  Season beef cubes with salt & pepper and brown on all sides.  For 2 pounds of meat I usually do this in 2 batches so I don't overcrowd the pan.  Transfer meat to a plate and set aside.
  2. Reduce heat slightly and add a touch more olive oil if needed.  Add onion and carrots to the pot and cook for 2-3 minutes.  Add the mushrooms, stirring occasionally, and cook until veggies have softened, approximately 10 minutes.
  3. Add garlic, thyme, tomato paste and cook for 3-4 minutes.  Add wine and bring to a boil, scraping up any brown bits on the bottom of the pot.  Cook until reduced by half, 4-5 minutes.
  4. Return beef to the pot.  Add the chicken stock and water.  Bring to a boil, reduce heat to low and simmer, covered for 1 hour, stirring occasionally.
  5. After 1 hour add the barley to the pot and continue to cook, covered, for 30 - 40 minutes, or until barley is tender.  Add frozen peas for the last 2-3 minutes of cooking.  Turn off heat, stir in parsley and serve.
3.2.2802

Filed Under: Soup Tagged With: barley, beef, comfort food, dinner, soup, stew

Quinoa with Chicken and Zucchini

September 28, 2011 by Susan


A few years back I posted a recipe for chicken and vegetable couscous.  After making the dish a few times I substituted the couscous with quinoa and have been making it that way ever since.  Quinoa is a super food, afterall, so I try to incorporate it whenever I can.  And it’s just so easy to cook!

Over the past few months I have made one more adjustment, substituting the olives with mushrooms.  I just can’t seem to stomach olives during this pregnancy.  And you know what – the dish is just as great!  I give this quinoa dish to my husband for lunch alot and he loves mushrooms, so I’ve gotten zero complaints from him.  It is quick to make and hearty to eat, an all around winner.

Here’s what you will need to serve 4…
2 tbsp olive oil

2 large thin, boneless chicken breasts, cubed

1 large onion

2 zucchini, cubed or cut into 1/2 moons

2 cloves garlic, minced

2 tsp grated lemon zest

Juice of one lemon

1/2 tsp crushed red pepper

1-2 pinches of cinnamon

8-10 crimini mushrooms, sliced (not too thin)

1 1/2 cup quinoa

3 cups chicken stock, low sodium

1/4 cup parsley, finely chopped

1/4 cup mint leaves, finely chopped

Salt & pepper
Add quinoa and chicken stock in a pot, bring to a boil, reduce to simmer and cook for approximately 15 minutes.  Fluff with a fork.

Meanwhile, heat olive oil in a large skillet.   Add the chicken cubes and cook until lightly browned on both sides, 3-5 minutes.  Push the chicken to one side of the pan and add the onion, zucchini and mushrooms.  Cook for 4-5 minutes.  Add the garlic, lemon zest, red pepper and cinnamon.  Season with salt & pepper.  Cook for 3 more minutes.

Add the cooked quinoa to the chicken mixture and stir to combine.  Turn off heat and add the parsley, mint and lemon juice.  Mix well.
Recipe originally adapted from Rachael Ray

Filed Under: Rice and Grains Tagged With: chicken, dinner, gluten free, healthy, lunch, mushrooms, Quinoa, zucchini

Curry Yogurt Chicken

July 29, 2011 by Susan


Every time I make this dish the two of us can’t stop exclaiming how much we love it.  I now try to make it once a week, regardless of what season it is or what the temperature is outside.  Hot out?  Don’t care, still going to make it.  We love it that much.

As my husband was quick to point out to me, this dish has just about everything anyone could want in a meal.  The chicken and rice help to fill you up, the curry, ginger and chili give it just the right amount of tingle (be sure to de-seed the chili pepper if you don’t want the fire!) and the yogurt gives the sauce just the right amount of velvety goodness.  Yet, it’s not too heavy.

Another thing I love about this meal…you can eat it in a bowl sitting in front of the TV.  Casual and comforting.  And the leftovers – amazing.

Here’s what you will need to serve 4-5 people…

Recipe

1/4 cup canola oil

2 pounds thin chicken cutlets, cubed

whole wheat flour, for dusting

2 tbsp finely chopped fresh ginger

1.5 tbsp curry powder

1 large garlic clove, minced

1 red chili pepper, sliced thin (seeds and ribs removed if you don’t want it spicy)

1 large red bell pepper, cored, seeded and cut into large dice

6-7 large vine ripened tomatoes, cut into large chunks

1/2 cup frozen corn kernels

1/3 cup frozen peas

7 oz container Greek yogurt, plain

1/2 – 2/3 cup water

1/3 cup chopped cilantro leaves, for garnish

salt & pepper

basmati rice

Method

In a large, deep skillet heat the oil.   Season the chicken cubes with salt and pepper then dust lightly with flour, coating all sides.  Tap off the excess flour and add chicken to hot oil in batches (don’t overload the skillet).  Cook chicken until lightly browned.  Transfer chicken to a plate.

In the same skillet add the ginger, red pepper, chile pepper and garlic and cook, stirring occasionally, until peppers are slightly softened, about 2 minutes.  Add the curry powder and cook for one minute longer.  Add the chopped tomatoes, corn, peas and water.  Bring to a soft boil.  Next add most of the yogurt.  Stir until smooth.

Add the chicken and any juices to the skillet.  Bring to a boil, reduce heat to low, cover and simmer for approximately 20 – 25 minutes stirring occasionally.  Turn off heat, add the remaining yogurt, stir until smooth and sprinkle with cilantro.  Serve over basmati rice.

Recipe adapted from Food & Wine Magazine

Curry Yogurt Chicken
 
Print
Author: Feasts And Fotos
Ingredients
  • ¼ cup canola oil
  • 2 pounds thin chicken cutlets, cubed
  • whole wheat flour, for dusting
  • 2 tbsp finely chopped fresh ginger
  • 1.5 tbsp curry powder
  • 1 large garlic clove, minced
  • 1 red chili pepper, sliced thin (seeds and ribs removed if you don't want it spicy)
  • 1 large red bell pepper, cored, seeded and cut into large dice
  • 6-7 large vine ripened tomatoes, cut into large chunks
  • ½ cup frozen corn kernels
  • ⅓ cup frozen peas
  • 7 oz container Greek yogurt, plain
  • ½ - ⅔ cup water
  • ⅓ cup chopped cilantro leaves, for garnish
  • salt & pepper
  • basmati rice
Method
  1. In a large, deep skillet heat the oil.   Season the chicken cubes with salt and pepper then dust lightly with flour, coating all sides.  Tap off the excess flour and add chicken to hot oil in batches (don't overload the skillet).  Cook chicken until lightly browned.  Transfer chicken to a plate.
  2. In the same skillet add the ginger, red pepper, chile pepper and garlic and cook, stirring occasionally, until peppers are slightly softened, about 2 minutes.  Add the curry powder and cook for one minute longer.  Add the chopped tomatoes, corn, peas and water.  Bring to a soft boil.  Next add most of the yogurt.  Stir until smooth.
  3. Add the chicken and any juices to the skillet.  Bring to a boil, reduce heat to low, cover and simmer for approximately 20 - 25 minutes stirring occasionally.  Turn off heat, add the remaining yogurt, stir until smooth and sprinkle with cilantro.  Serve over basmati rice.
3.2.2802

Filed Under: Main Dishes Tagged With: chicken, curry, dinner, lunch, yogurt

Mushroom Soup

January 18, 2011 by Susan

MushroomSoupR

I have become slightly obsessed with soups this winter.  Mainly because it has been absolutely freezing cold here in NYC over the past month.  And let’s not forget about the 3 snowstorms we have already had.  I am not a cold-weather-winter person.  At all.  Soups, however, make it all somewhat bearable.

In light of this obsession I have been scouring recipes for some interesting new soups to add to my repertoire.  I could not find one specific recipe that knocked me over, so I decided to create my own.  Ideally I like to pick a new soup each week and make a big pot of it.  I think having 5 excellent soups in the rotation would be ideal.  This mushroom soup is one of the five, for sure.

If you like mushrooms you will love this soup.  It is luscious and complex.  There is not one drop of cream in this soup so I hereby declare it healthy.  And if I can impress one thought upon you right now it would be this…do not skip the sherry!  And I wouldn’t skip the truffle oil either, come to think of it.  Without them this soup is just ok.  These two ingredients take this soup from average to outstanding.

Here’s what you will need to make a big pot that serves about 8-10…

Recipe

32 ounces of mushrooms, I use a mix of shiitake (sliced) and crimini (cut in half or quarters)

2 tbsp butter

2 tbsp olive oil

1 large onion, diced

1 large leek, white and light green part only, washed and sliced

6 cloves garlic, smashed

12-15 sprigs thyme, tied in a bundle

1 large Idaho potato, peeled and cut into 3/4 inch cubes

8 cups chicken stock

4 oz dry sherry

2 tsp white truffle oil

palmful of parsley leaves

salt & pepper

chopped parsley, for garnish

Method

In a large soup pot heat the olive oil and butter.  As the butter is melting add the bundle of thyme and stir it around in the butter and oil for a few seconds.  Add the onion, leek (wash really well, these suckers are very dirty!) and a pinch of salt & pepper.  Saute over medium heat for 5-6 minutes.  Add the mushrooms and garlic and cook for 8-10 minutes.

Next add the potato and chicken stock.  Bring to a boil, lower heat and simmer for one hour.  After 45 minutes of cooking add the parsley leaves, then allow to continue cooking for the remaining 15 minutes.  Remove thyme bundle.

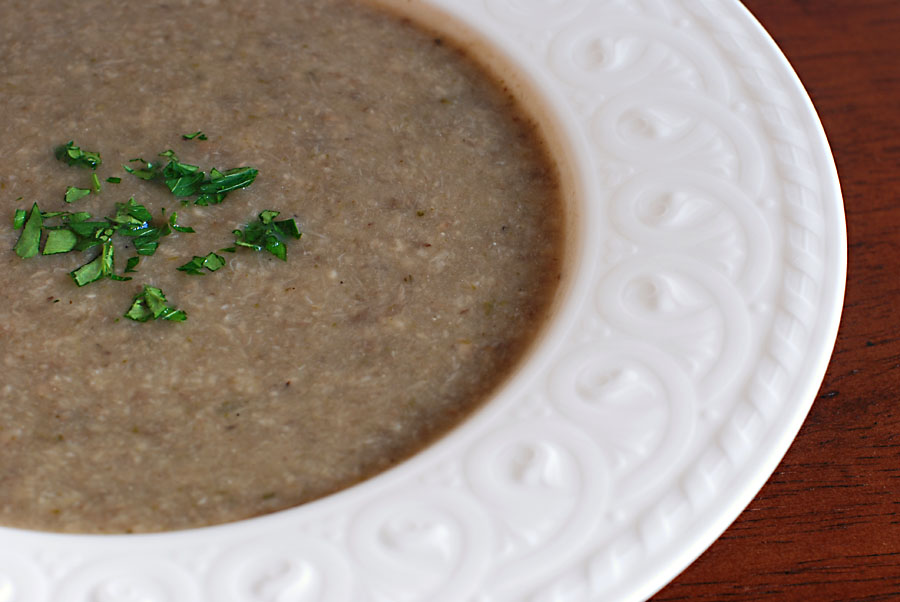
Puree the mixture with an immersion blender (love this tool!) or in a blender or food processor until smooth.  As you can see from the photo above, I do not puree this soup into oblivion, I like the rusticity of a few small pieces of mushroom every now and again.  Those types of things don’t get me upset.

Once the mixture is pureed (to the consistency of your choosing) add the sherry and truffle oil and stir with a spoon to combine.  As I mentioned above, please don’t skip these last two ingredients.  Trust me.

Recipe inspired by various sources.

Mushroom Soup
 
Print
Author: Feasts And Fotos
Ingredients
  • 32 ounces of mushrooms, I use a mix of shiitake (sliced) and crimini (cut in half or quarters)
  • 2 tbsp butter
  • 2 tbsp olive oil
  • 1 large onion, diced
  • 1 large leek, white and light green part only, washed and sliced
  • 6 cloves garlic, smashed
  • 12-15 sprigs thyme, tied in a bundle
  • 1 large Idaho potato, peeled and cut into ¾ inch cubes
  • 8 cups chicken stock
  • 4 oz dry sherry
  • 2 tsp white truffle oil
  • palmful of parsley leaves
  • salt & pepper
  • chopped parsley, for garnish
Method
  1. In a large soup pot heat the olive oil and butter.  As the butter is melting add the bundle of thyme and stir it around in the butter and oil for a few seconds.  Add the onion, leek (wash really well, these suckers are very dirty!) and a pinch of salt & pepper.  Saute over medium heat for 5-6 minutes.  Add the mushrooms and garlic and cook for 8-10 minutes.
  2. Next add the potato and chicken stock.  Bring to a boil, lower heat and simmer for one hour.  After 45 minutes of cooking add the parsley leaves, then allow to continue cooking for the remaining 15 minutes.  Remove thyme bundle.
  3. Puree the mixture with an immersion blender (love this tool!) or in a blender or food processor until smooth.  As you can see from the photo above, I do not puree this soup into oblivion, I like the rusticity of a few small pieces of mushroom every now and again.  Those types of things don't get me upset.
  4. Once the mixture is pureed (to the consistency of your choosing) add the sherry and truffle oil and stir with a spoon to combine.  As I mentioned above, please don't skip these last two ingredients.  Trust me.
3.2.2802

Filed Under: Soup Tagged With: dinner, first course, healthy, lunch, mushroom, soup

Jerk Pork Tenderloin

June 10, 2009 by Susan

PorkTenderloinSliced

While flipping through an old issue of Oprah Magazine, I stumbled upon this recipe from Michelle Bernstein, the cooking dynamo from Miami.  It sounded so delicious I ripped out the page and made it a few nights later.

I love pork tenderloin.  It is lean and flavorful and very quick to cook.  (Be careful not to overcook it!)   Just like chicken, you can marinate pork tenderloin in so many different ways giving a new flavors to the meat each time.

At first glance this recipe looked like it had alot of ingredients (something I usually shy away from) however most of them I had on hand and everything simply gets tossed into a food processor.  Easy!  I made very few changes to her recipe, the main one being roasting the tenderloins in the oven instead of grilling them.  The pork came out tender and flavorful and the sauce…oh, the sauce.  Such a burst of flavors…herbs, spice, sweetness.

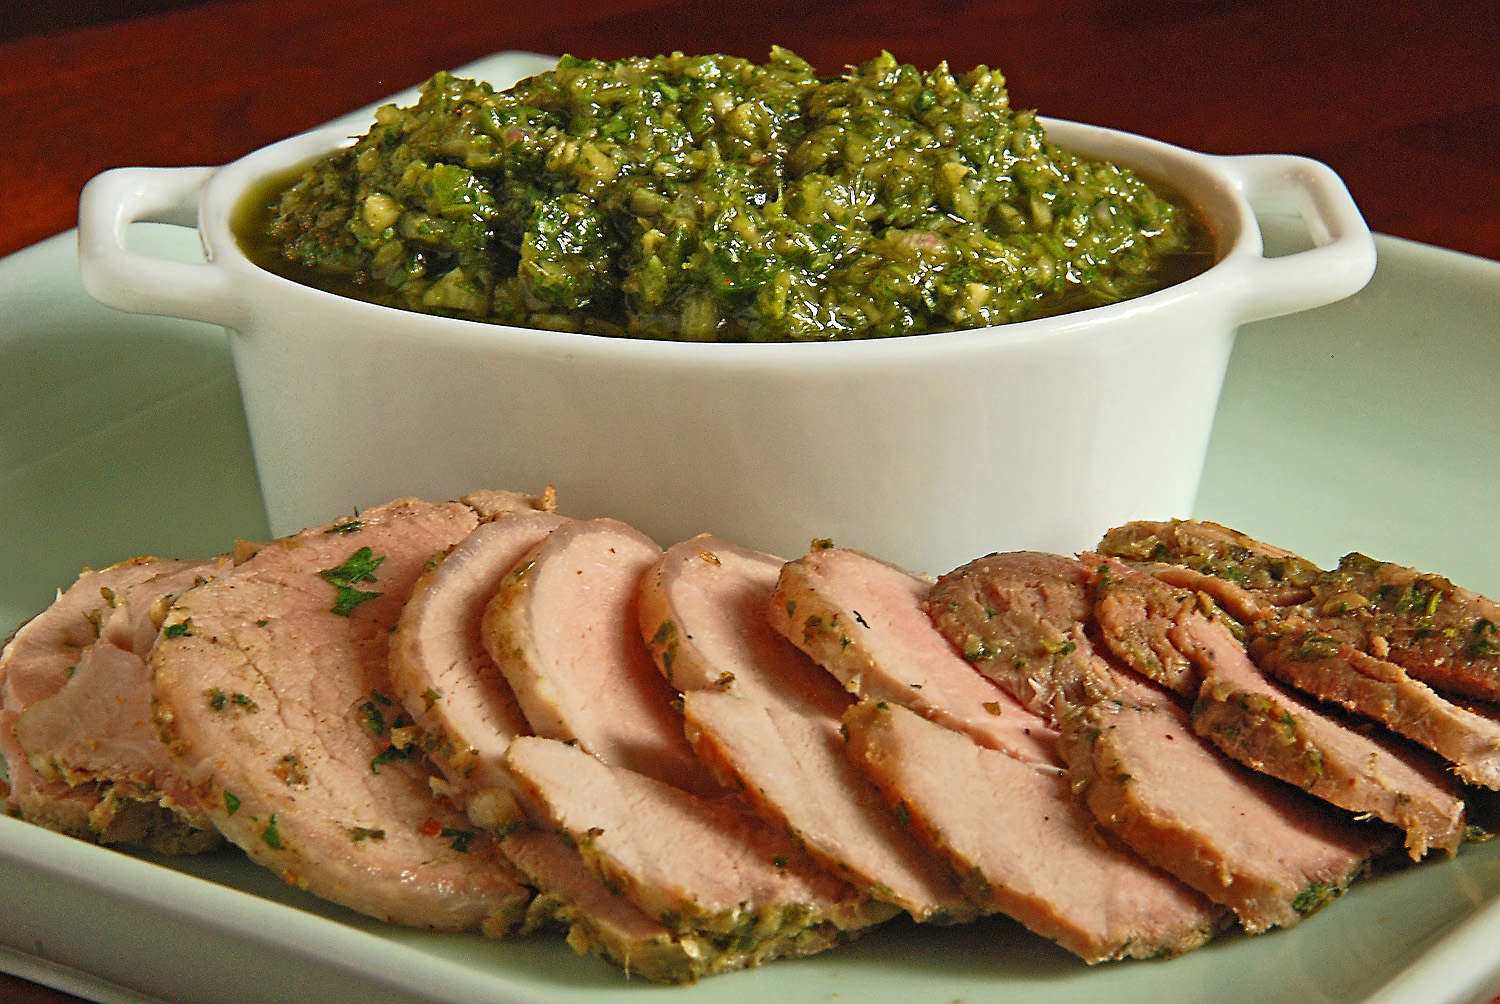
Although the meat was yummy freshly cooked, what amazed me was the leftovers.  Outstanding.  I sliced the leftover pork into very thin slices (as in above photo).  Then, I toasted two pieces of whole wheat bread.  Slathered the leftover sauce on both sides of the bread, then layered on the pork slices.  That’s it.  I didn’t even need to add anything else to it.  I can’t tell you how delicious this sandwich is!  I cannot wait to make this again just to have the leftovers.  Is that even normal?

So make extra, either buy bigger tenderloins or even an extra one.  You will love this sandwich.

Here’s what you will need to make 4 servings…

Recipe

1 cup olive oil

1/4 cup fresh orange juice

1 small bunch fresh flat leaf parsley

1 small bunch fresh cilantro

1/2 bunch whole scallions, coarsely chopped

2 medium shallots, coarsely chopped

1 (1.5 inch) piece fresh ginger, peeled and coarsely chopped

3 tbsp white wine vinegar

2 tbsp fresh thyme leaves

1 medium jalapeno pepper, coarsely chopped (with some seeds and ribs)

2 tbsp light brown sugar

1 tbsp worchestershire sauce

1/4 tsp ground cloves

1/4 tsp ground all spice

2 pork tenderloins

1 tsp salt

Method

Preheat the oven to 425 degrees.  Put all ingredients (except pork and salt) into a food processor and puree until smooth.

Place tenderloins in a non reactive dish and pour half the marinade over the pork, massaging it into the pork on all sides.  Cover with plastic wrap and place in the fridge.  Marinate for at least 8 hours, up to 24 hours.  Cover and refrigerate remaining marinade.

When you are ready to cook the pork remove the tenderloins from the fridge and allow to sit out for 20 minutes or so.  Scrape most of the marinade off the pork and sprinkle with salt.  Discard marinade.  Remove remaining sauce from the fridge and allow to come to room temperature.

Roast tenderloins in the oven for roughly 20 minutes (depending on the size of the tenderloins) or until a meat thermometer reads 145 degrees.  Of course you can grill them if you are lucky enough to have a grill and an outdoor space to put a grill.  Remove from the oven, transfer to a cutting board, cover with aluminum foil and allow the meat to rest 10 minutes.  The meat should be pink and juicy.

Cut pork into 1/2 inch diagonal slices and arrange on serving platter.  Sprinkle some of the sauce over the sliced pork, serving the remaining sauce alongside.

Original recipe found here http://www.oprah.com/recipe/omagazine/recipes/200903_omag_recipe_jerk_pork


Jerk Pork Tenderloin
 
Print
Author: Feasts And Fotos
Ingredients
  • 1 cup olive oil
  • ¼ cup fresh orange juice
  • 1 small bunch fresh flat leaf parsley
  • 1 small bunch fresh cilantro
  • ½ bunch whole scallions, coarsely chopped
  • 2 medium shallots, coarsely chopped
  • 1 (1.5 inch) piece fresh ginger, peeled and coarsely chopped
  • 3 tbsp white wine vinegar
  • 2 tbsp fresh thyme leaves
  • 1 medium jalapeno pepper, coarsely chopped (with some seeds and ribs)
  • 2 tbsp light brown sugar
  • 1 tbsp worchestershire sauce
  • ¼ tsp ground cloves
  • ¼ tsp ground all spice
  • 2 pork tenderloins
  • 1 tsp salt
Method
  1. Preheat the oven to 425 degrees.  Put all ingredients (except pork and salt) into a food processor and puree until smooth.
  2. Place tenderloins in a non reactive dish and pour half the marinade over the pork, massaging it into the pork on all sides.  Cover with plastic wrap and place in the fridge.  Marinate for at least 8 hours, up to 24 hours.  Cover and refrigerate remaining marinade.
  3. When you are ready to cook the pork remove the tenderloins from the fridge and allow to sit out for 20 minutes or so.  Scrape most of the marinade off the pork and sprinkle with salt.  Discard marinade.  Remove remaining sauce from the fridge and allow to come to room temperature.
  4. Roast tenderloins in the oven for roughly 20 minutes (depending on the size of the tenderloins) or until a meat thermometer reads 145 degrees.  Of course you can grill them if you are lucky enough to have a grill and an outdoor space to put a grill.  Remove from the oven, transfer to a cutting board, cover with aluminum foil and allow the meat to rest 10 minutes.  The meat should be pink and juicy.
  5. Cut pork into ½ inch diagonal slices and arrange on serving platter.  Sprinkle some of the sauce over the sliced pork, serving the remaining sauce alongside.
3.2.2802

Filed Under: Main Dishes Tagged With: dinner, jerk, Marinade, meat, pork tenderloin

Pasta With Lentils

December 6, 2008 by Susan

PastaLentilsFinalR

The Italian name for this deliciousness is Pasta e Lenticchie.  The way I see it, this dish should really be called Lentils with Pasta.  It is mostly lentils with some pasta thrown in, not the other way around.  It is an Italian dish that I grew up eating, my mom cooked this for us all the time.  It is traditionally from the Campania region of Italy, specifically the Naples area, which is where my family is from.

I can’t quite decide if this is more of a stew or a soup.  I think it is a mixture of both.  A stoup!  It is quite hearty and as most of you  might already know, lentils are super healthy.  They are loaded with folate, fiber and potassium and are an excellent source of protein.

I put my own slight spin on this recipe, it is not the exact same one my mother makes.  However, it’s very close.  I saute my vegetables first in some olive oil (she doesn’t) and I thought to add the bay leaves and thyme.  Basically, you make a big pot of the lentils and you store it in the fridge.  When you want to eat it, you boil up some pasta and then add the lentils to the pasta.  If you add all the pasta into the lentils and store it that way, the pasta tends to get mushy.  About the pasta – you can use any small shape you like.  Normally, this is made with spaghetti broken into 1 inch pieces, or the little elbows that I used in the photo above.  Both are fantastic.  I usually get the whole wheat or multi grain pasta.

Once the pot of lentils is made, this is a very quick and easy meal that you can enjoy all week long for lunch, dinner or a comforting snack on a cold day.

Here is what you will need to serve 4-6…

Recipe 

2 cups lentils (picked through and rinsed)

3 cups water

3 cups chicken stock (or vegetable stock)

2 medium carrots, diced

3 stalks celery, diced

1 large onion, diced

2 cloves garlic, minced

1 teaspoon pepperoncino

2 bay leaves

1 tsp thyme

4 whole peeled tomatoes, chopped with their juice

chopped parsley

short/small pasta (shape of your choice)

parmigiano reggiano or pecorino romano cheese

Method 

Coat the bottom of a dutch oven with olive oil and saute onions, carrots and celery for about 5 minutes or until they begin to soften.  Add garlic and pepperoncino and saute for one minute.  Add lentils and stir one minute.  Add water, stock, tomatoes, bay leaves and thyme and stir to combine.  Bring to a boil, reduce heat to a simmer , cover and cook for approximately 70-90 minutes or until the lentils are tender.  Lentils are done!

For reheating/serving:  boil water and cook the pasta until just about done (one minute shy of the directed cooking time).  Drain pasta, reserving some of the pasta water.  This is important!  The lentils thicken up and you most likely will have to add some pasta water to the mixture to loosen it up a bit.  Add some lentils to the pasta, as much as you like and depending on how many people you are serving.  Stir and cook together for one minute.  Turn off heat and add a handful of fresh parsley.  I love alot of parsley in this, it really give a nice, fresh flavor.  Top with a spoonful of cheese and enjoy!


Pasta With Lentils
 
Print
Author: Feasts And Fotos
Ingredients
  • 2 cups lentils (picked through and rinsed)
  • 3 cups water
  • 3 cups chicken stock (or vegetable stock)
  • 2 medium carrots, diced
  • 3 stalks celery, diced
  • 1 large onion, diced
  • 2 cloves garlic, minced
  • 1 teaspoon pepperoncino
  • 2 bay leaves
  • 1 tsp thyme
  • 4 whole peeled tomatoes, chopped with their juice
  • chopped parsley
  • short/small pasta (shape of your choice)
  • parmigiano reggiano or pecorino romano cheese
Method
  1. Coat the bottom of a dutch oven with olive oil and saute onions, carrots and celery for about 5 minutes or until they begin to soften.  Add garlic and pepperoncino and saute for one minute.  Add lentils and stir one minute.  Add water, stock, tomatoes, bay leaves and thyme and stir to combine.  Bring to a boil, reduce heat to a simmer , cover and cook for approximately 70-90 minutes or until the lentils are tender.  Lentils are done!
  2. For reheating/serving:  boil water and cook the pasta until just about done (one minute shy of the directed cooking time).  Drain pasta, reserving some of the pasta water.  This is important!  The lentils thicken up and you most likely will have to add some pasta water to the mixture to loosen it up a bit.  Add some lentils to the pasta, as much as you like and depending on how many people you are serving.  Stir and cook together for one minute.  Turn off heat and add a handful of fresh parsley.  I love alot of parsley in this, it really give a nice, fresh flavor.  Top with a spoonful of cheese and enjoy!
3.2.2802

Filed Under: Main Dishes, Pasta Tagged With: dinner, healthy, lentils, lunch, pasta, soup, stew

  • 1
  • 2
  • Next Page »
Hello and welcome to Feasts and Fotos!

Archives

Categories

Copyright © 2025 · Foodie Pro Theme by Shay Bocks · Built on the Genesis Framework · Powered by WordPress