FEASTS AND FOTOS

  • Home
  • About
  • Happenings
  • Contact
You are here: Home / Archives for comfort food

Parsnip And White Bean Soup

March 2, 2015 by Susan

ParsnipSoupFinalRR

Meet my new favorite soup for the past month.  This soup has gotten us through the repeated snow storms we have been having here in New York.  It has eased the pain and monotony of being cooped up inside, (with a potty-training-toddler!) sheltering ourselves from the bitter, painful cold outside.  It has been a welcome reward after braving the cold to shovel yet more snow.  Is it spring yet?

Parsnips are delicious and, in my opinion, are an under used root vegetable. At least they have been in my house.  I do occasionally roast them and they are so good, they taste like candy.  Literally.  They are a very sweet vegetable.  For those of you that don’t know what a parsnip is, it is the ‘white carrot’.  It looks very similar to a carrot, but it’s cream-colored, has a tougher texture and is much sweeter.

The parsnips in this soup are paired with white beans which seems to mellow out the parsnip flavor a bit.  It is a wonderful flavor combination and the addition of sage really brings an earthy component. This soup is on the thicker side, and creamy, yet there is no cream or potatoes in the recipe.  The magic of pureed beans!

On the topic of sage, it was the one herb in my garden that remained throughout a good portion of this winter.  Even in the freezing cold, a few leaves were still there, hanging on for dear life.  It was the arrival of Winter Storm Juno that did my poor sage in.  Nothing could survive that storm.

I have Jamie Oliver to thank for this particular recipe (among many others).  I kinda have a small crush on him.  Most of his recipes (I try the easier ones) are fantastic and I think he is funny and adorable and I’m impressed with his Food Revolution crusade. I particularly love his 15- Minute Meals show and am hoping more of his shows will come to the US.

This is a very easy soup recipe to make.  And I hear we are supposed to get more snow this week, so you might want to go buy some parsnips.

Here’s what you will need to serve 4-6 people…

Recipe

2 tbsp olive oil

1 tbsp butter (optional)

3 medium parsnips (2 cups), peeled and chopped into cubes

1 large onion, roughly chopped

3 dried bay leaves

2 15-oz (or 19oz) cans cannellini beans, drained and rinsed

7 medium sage leaves, chopped

48 oz low-sodium chicken stock

salt & pepper to taste

Method

Heat the oil and butter in a soup pot over medium heat. Add the parsnips (don’t be tempted to add more than 2 cups, it will make the soup too sweet), onion, salt & pepper, stirring occasionally until softened and translucent.  Add the white beans, sage and stock.  Stir to combine.  Add the bay leaves and bring to a boil.  Reduce heat, partially cover the pot and simmer for 20 minutes.

Allow soup to cool slightly and then puree in batches in a high powered blender. The texture of the soup should be silky smooth.

Recipe adapted from Jamie Oliver


Parsnip And White Bean Soup
 
Print
Author: Feasts And Fotos
Ingredients
  • 2 tbsp olive oil
  • 1 tbsp butter (optional)
  • 3 medium parsnips (2 cups), peeled and chopped into cubes
  • 1 large onion, roughly chopped
  • 3 dried bay leaves
  • 2 15-oz cans cannellini beans, drained and rinsed
  • 7 medium sage leaves, chopped
  • 48 oz low-sodium chicken stock
  • salt & pepper to taste
Method
  1. Heat the oil and butter in a soup pot over medium heat. Add the parsnips, onion, salt & pepper, stirring occasionally until softened and translucent. Add the white beans, sage and stock. Stir to combine. Add the bay leaves and bring to a boil. Reduce heat, partially cover the pot and simmer for 20 minutes.
  2. Allow soup to cool slightly and then puree in batches in a high powered blender. The texture of the soup should be silky smooth.
3.2.2929

Filed Under: Soup Tagged With: bay, comfort food, healthy, jamie oliver, parsnip, sage, soup, white beans

Roasted Vegetable Soup

January 12, 2015 by Susan

RoastedVegetableSoupR

Most soups I make are prepared using the same method; sauteing onions, garlic and veggies in a pot on the stove and then adding stock and simmering away.  This soup turns that method upside down!  I loved the concept and it sounded so easy.  Naturally, I thought, could it actually be good?

Oh yeah!  So good.  I am already a huge fan of oven roasting vegetables to eat as a side dish. Favorites are broccoli, cauliflower and carrots.  I feel roasting the vegetables really brings out their flavor, so much more than, let’s say, steaming.

The other element that I love about this soup is that it includes eggplant. Eggplant!  I haven’t come across many soup recipes with eggplant in them, have you?  To be honest, you would be hard pressed to detect the eggplant in here.  All the flavors of the vegetables blend well and are so delicious.  Even the sage, it’s there in the background, not overpowering at all.  The sage I used to make this particular pot of soup came from my garden, still going strong in December!  It is a hearty herb, that sage.

I am happy to report that this soup recipe is quite forgiving.  I think if you stick to the base vegetables (eggplant, carrots, potatoes) you can add some others (celery, parsnips) and it would be just as great.  Making this recipe would be a great way to clear out your fridge of any root veggies that might be slightly past their prime.  You can also comfortably make some substitutions. Don’t have shallots?  Add an onion instead.  Want this soup to be vegetarian?  Use vegetable stock instead of chicken stock. Prefer it to be a touch thinner?  Add more stock.  Forgiving is good.

This roasted vegetable soup is very delicious and super comforting on a cold, snowy day (we’ve already had quite a few in the NY area).  It is very thick, so it is filling and perfect on its own for a lunch or light dinner.  And thick enough that my 3-year-old can feed herself this soup, which she loves.

Add a slice of toasted rustic bread to dip and you will be in heaven.

Here’s what you will need to serve 6-8…

Recipe

3-4 tbsp olive oil

1 large eggplant, peeled and chopped into 2 inch cubes

3 carrots, sliced into 1 inch pieces

3 large shallots, quartered

6 cloves garlic, whole

2 large Idaho potatoes, peeled and chopped into 1 inch chunks

6 cups chicken stock (or vegetable stock)

3 large sage leaves

sea salt & pepper, to taste

Method

Preheat oven to 375 degrees.

Oil the bottom of a large, rimmed sheet pan with 1 tbsp of oil (rub it around with your fingers to coat) and add everything except the sage leaves.  Add 2-3 tbsp of olive oil, salt & pepper and toss to coat.  Arrange in a single layer.

Roast for 45 minutes, flipping vegetables once or twice, ensuring they brown slightly but do not burn.  Remove pan from oven, add sage leaves on top of veggies on one side of the pan, and then pile the remaining veggies on top of the sage leaves.  The heat from the veggies will wilt the sage.  Allow to cool slightly.

In a high powered blender, add vegetables and broth in manageable batches.  Pour into a large pot, heat slightly and serve or store in the fridge for up to 4-5 days.

Recipe adapted from Clean Eating Magazine


Roasted Vegetable Soup
 
Print
Author: Feasts And Fotos
Ingredients
  • 3-4 tbsp olive oil
  • 1 large eggplant, peeled and chopped into 2 inch cubes
  • 3 carrots, sliced into 1 inch pieces
  • 3 large shallots, quartered
  • 6 cloves garlic, whole
  • 2 large Idaho potatoes, peeled and chopped into 1 inch chuncks
  • 6 cups chicken stock (or vegetable stock)
  • 3 large sage leaves
  • sea salt & pepper, to taste
Method
  1. Preheat oven to 375 degrees.
  2. Oil the bottom of a large, rimmed sheet pan with 1 tbsp of oil (rub it around with your fingers to coat) and add everything except the sage leaves. Add 2-3 tbsp of olive oil, salt & pepper and toss to coat. Arrange in a single layer.
  3. Roast for 45 minutes, flipping vegetables once or twice, ensuring they brown slightly but do not burn. Remove pan from oven, add sage leaves on top of veggies on one side of the pan, and then pile the remaining veggies on top of the sage leaves. The heat from the veggies will wilt the sage. Allow to cool slightly.
  4. In a high powered blender, add vegetables and broth in manageable batches. Pour into a large pot, heat slightly and serve or store in the fridge for up to 4-5 days.
3.2.2802

Filed Under: Soup Tagged With: carrots, comfort food, dinner, eggplant, healthy, lunch, potatoes, roasted, sage, soup, vegetable

Roasted Cauliflower with Lemon Cilantro Dressing

November 3, 2014 by Susan

RoastedCauliflowerR

Whenever I  make vegetables as a side dish, 98% of the time I will roast them.  I think roasting brings out a wonderful, deep flavor of the vegetables and they get all crisp and caramelized on the outside. And, truthfully, roasting vegetables is so easy!  Just season and pop in the oven.  You only need to flip them once during the cooking time and voila, they are done.  My favorite vegetables to roast are cauliflower, broccoli and carrots.

This recipe is actually two recipes in one.  The first part, simply roasting the cauliflower with just salt, pepper and oil, is my basic recipe for making roasted vegetables and is practically effortless.  The cauliflower is delicious just like that. But every once in a while it is nice to have something a bit different, so I created this dressing to toss with the cauliflower after they have been roasted.  It comes together very quickly and can be prepared just after you toss the cauliflower in the oven.

Now we are having a hard time figuring out which preparation is our favorite.  If I told you we snacked on these during the day once would you believe me?  It’s true!  We actually snacked on cauliflower, as strange as that sounds.  The vinaigrette is such a terrific complement to the cauliflower and the addition of that cumin just makes it.  It almost lends an Indian spin to the recipe.

I love it when food that is healthy for us is also delicious. Cauliflower is filled with phytonutrients that fight disease and fiber that really helps to keep you full longer.  I end up feeling good about eating it, and there is no guilt over eating a lot of it.

Here’s what you will need to serve 2-3 as a side dish…

Recipe

1 small head of cauliflower, cut into florets of various sizes, washed and pat dried

2 Tbsp olive oil

Sea Salt (to taste)

Pepper (to taste)

Vinaigrette

1/2 lemon, zested

1 Tbsp lemon juice

2 Tbsp cilantro, finely chopped

3 Tbsp olive oil

1 small clove garlic, grated

1/8 tsp (scant) of ground cumin

Method

Preheat the oven to 400 degrees.

Turn the cauliflower upside down and start cutting into all the stalks and leaves until they are all removed.  Cut cauliflower into florets.  Wash and pat dry.  Lay on a large rimmed baking sheet and add 2 Tbsp olive oil, sea salt and pepper.  Mix well with your hands until the cauliflower is coated.

Roast in the oven for 30 – 40 minutes depending on how large your florets are and how soft you like your vegetables cooked.  I prefer mine more firm (as opposed to my husband who likes his softer), so I leave 1/2 the florets large so they don’t get overcooked.  Half way through the cooking time take the baking sheet out of the oven and turn each cauliflower floret over.  I find using a pair of tongs works the best.  Put back in the oven.

While the cauliflower is cooking get started on the vinaigrette.  To a small bowl add the lemon zest, juice, cilantro, grated garlic, cumin and 3 Tbsp of olive oil.  Whisk well until completely mixed.

Once done, remove  the cauliflower from the oven and transfer them directly into a large bowl.  Add the vinaigrette, one tablespoon at a time, to the cooked cauliflower, mixing to combine.  I usually end up using all the vinaigrette, but if you see they are getting soaked in the liquid, stop adding and taste.  This will all depend upon how large your cauliflower is. In the end, I don’t soak the vegetables, just give them a nice coating.


Roasted Cauliflower
 
Print
Author: Feasts And Fotos
Ingredients
  • 1 small head of cauliflower, cut into florets of various sizes, washed and pat dried
  • 2 Tbsp olive oil
  • Sea Salt (to taste)
  • Pepper (to taste)
  • Vinaigrette
  • ½ lemon, zested
  • 1 Tbsp lemon juice
  • 2 Tbsp cilantro, finely chopped
  • 3 Tbsp olive oil
  • 1 small clove garlic, grated
Method
  1. Preheat the oven to 400 degrees.
  2. Turn the cauliflower upside down and start cutting into all the stalks and leaves until they are all removed.  Cut cauliflower into florets.  Wash and pat dry.  Lay on a large rimmed baking sheet and add 2 Tbsp olive oil, sea salt and pepper.  Mix well with your hands until the cauliflower is coated.
  3. Roast in the oven for 30 - 40 minutes depending on how large your florets are and how soft you like your vegetables cooked.  I prefer mine more firm (as opposed to my husband who likes his softer), so I leave ½ the florets large so they don't get overcooked.  Half way through the cooking time take baking sheet out of the oven and turn each cauliflower floret over.  I find using a pair of tongs works the best.  Put back in the oven.
  4. While the cauliflower is cooking get started on the vinaigrette.  To a small bowl add the lemon zest, juice, cilantro, grated garlic and 3 Tbsp of olive oil.  Whisk well until completely mixed.
  5. Once done, remove  the cauliflower from the oven and transfer them directly into a large bowl.  Add the vinaigrette, one tablespoon at a time, to the cooked cauliflower, mixing to combine.  I usually end up using all the vinaigrette, but if you see they are getting soaked in the liquid, stop adding and taste.  This will all depend upon how large your cauliflower is. In the end, I don't soak the vegetables, just give them a nice coating.
3.2.2802

Filed Under: Sides and Sauces, Vegetables Tagged With: cauliflower, cilantro, comfort food, cumin, healthy, lemon, roasted, side dish, vegetable, vegetarian

Mexican Chicken Soup

February 2, 2013 by Susan

MexicanChickenSoupR

I have been eyeing this recipe for a few years now and never got around to making it.  Until now.  Not sure why it took me so long – maybe because I make many different soups that we love and want to eat all the time.  I am happy to now report that this recipe will also be put into the winter soup rotation.  We really liked it!  If you can get your hands on a pre-made rotisserie chicken, this will be super easy and quick to prepare.  And lately, I’m all about quick and easy preparations.

The main change (addition) I made to the recipe is adding corn.  I just felt that a mexican chicken soup needed corn in it.  Plus, i like the pop of yellow color in here. Oh, and we don’t really add all the extras when serving, but you are free to add some tortillas and sour cream to each bowl when serving.

Here’s what you will need to serve approximately 6-8 people (one pot of soup)…

Recipe

1 rotisserie chicken, meat shredded

2 medium onions, chopped

2 stalks celery, chopped

4 medium carrots, chopped

3/4 cup frozen corn

4 large garlic cloves, minced

2 1/2 quarts chicken stock, low sodium

1 (28-ounce) can whole tomatoes, break up with a hand blender or in a food processor

4 jalapenos, seeded and minced (you can leave some seeds for some spice)

1 teaspoon (heaping) ground cumin

1 teaspoon (heaping) ground coriander

1 small bunch cilantro, chopped

salt & pepper to taste

Method

Heat 3 tablespoons of olive oil in a large pot or Dutch oven. Add the onions, celery, and carrots and cook over medium-low heat for 10 minutes, or until the onions become translucent. Add the garlic and cook for 30 seconds. Add the chicken stock, tomatoes with their juice, jalapenos, cumin, coriander and some salt and pepper to taste.

Bring soup to a boil, then lower heat and simmer for 25 minutes.  Add frozen corn and shredded chicken, continue to simmer soup for another 10 minutes.

Add all of the cilantro, mix to combine and ladle into bowls. Yum!

Recipe adapted from Ina Garten 

Mexican Chicken Soup
 
Print
Author: Feasts And Fotos
Ingredients
  • 1 rotisserie chicken, meat shredded
  • 2 medium onions, chopped
  • 2 stalks celery, chopped
  • 4 medium carrots, chopped
  • ¾ cup frozen corn
  • 4 large garlic cloves, minced
  • 2½ quarts chicken stock, low sodium
  • 1 (28-ounce) can whole tomatoes, break up with a hand blender or in a food processor
  • 4 jalapenos, seeded and minced (you can leave some seeds for some spice)
  • 1 teaspoon (heaping) ground cumin
  • 1 teaspoon (heaping) ground coriander
  • 1 small bunch cilantro, chopped
  • salt & pepper to taste
Method
  1. Heat 3 tablespoons of olive oil in a large pot or Dutch oven. Add the onions, celery, and carrots and cook over medium-low heat for 10 minutes, or until the onions become translucent. Add the garlic and cook for 30 seconds. Add the chicken stock, tomatoes with their juice, jalapenos, cumin, coriander and some salt and pepper to taste.
  2. Bring soup to a boil, then lower heat and simmer for 25 minutes.  Add frozen corn and shredded chicken, continue to simmer soup for another 10 minutes.
  3. Add all of the cilantro, mix to combine and ladle into bowls.
3.2.2802


Filed Under: Soup Tagged With: chicken, chicken soup, comfort food, jalapeno, mexican, soup, winter

Beef Barley Soup

October 28, 2011 by Susan

BeefBarleySoupRThat winter chill is back in the air.  And that could only mean one thing – soup time!

I love soups, particularly hearty ones and am constantly on the lookout for a new soup to add to my winter-soup-rotation.  This one has made the cut.  It’s a cross between a soup and a stew, actually.  A complete meal in a bowl.  The barley really thickens up the soup.  One time I was a little short on barley so I added in some cooked quinoa that I had leftover in the fridge.  It was wonderful.

I adapted this recipe from Martha Stewart.  I’ve already made it a few times and tweaked it to my liking, adding more meat and mushrooms than originally called for and completely introducing thyme (always goes great with mushrooms) and peas.  I hope you love my version as much as we do!

Here’s what you will need to serve 6…

Recipe

2 tbsp olive oil

2 pounds beef chuck, cut into 3/4 inch cubes

1 large onion, chopped

1 large carrot, chopped

1 package crimini mushrooms, sliced

1 package shiitake mushrooms, sliced

2 tbsp garlic, minced (approx 4 cloves)

1 tsp chopped thyme

2 tbsp tomato paste

3/4 cup dry red wine

4 cups chicken stock, low sodium

2 1/2 cups water

3/4 cup barley

1/2 cup frozen peas

1/4 cup parsley, chopped

salt & pepper

Method

Heat olive oil in a large heavy pot or dutch oven over medium heat.  Season beef cubes with salt & pepper and brown on all sides.  For 2 pounds of meat I usually do this in 2 batches so I don’t overcrowd the pan.  Transfer meat to a plate and set aside.

Reduce heat slightly and add a touch more olive oil if needed.  Add onion and carrots to the pot and cook for 2-3 minutes.  Add the mushrooms, stirring occasionally, and cook until veggies have softened, approximately 10 minutes.

Add garlic, thyme, tomato paste and cook for 3-4 minutes.  Add wine and bring to a boil, scraping up any brown bits on the bottom of the pot.  Cook until reduced by half, 4-5 minutes.

Return beef to the pot.  Add the chicken stock and water.  Bring to a boil, reduce heat to low and simmer, covered for 1 hour, stirring occasionally.

After 1 hour add the barley to the pot and continue to cook, covered, for 30 – 40 minutes, or until barley is tender.  Add frozen peas for the last 2-3 minutes of cooking.  Turn off heat, stir in parsley and serve.

Beef Barley Soup
 
Print
Author: Feasts And Fotos
Ingredients
  • 2 tbsp olive oil
  • 2 pounds beef chuck, cut into ¾ inch cubes
  • 1 large onion, chopped
  • 1 large carrot, chopped
  • 1 package crimini mushrooms, sliced
  • 1 package shiitake mushrooms, sliced
  • 2 tbsp garlic, minced (approx 4 cloves)
  • 1 tsp chopped thyme
  • 2 tbsp tomato paste
  • ¾ cup dry red wine
  • 4 cups chicken stock, low sodium
  • 2½ cups water
  • ¾ cup barley
  • ½ cup frozen peas
  • ¼ cup parsley, chopped
  • salt & pepper
Method
  1. Heat olive oil in a large heavy pot or dutch oven over medium heat.  Season beef cubes with salt & pepper and brown on all sides.  For 2 pounds of meat I usually do this in 2 batches so I don't overcrowd the pan.  Transfer meat to a plate and set aside.
  2. Reduce heat slightly and add a touch more olive oil if needed.  Add onion and carrots to the pot and cook for 2-3 minutes.  Add the mushrooms, stirring occasionally, and cook until veggies have softened, approximately 10 minutes.
  3. Add garlic, thyme, tomato paste and cook for 3-4 minutes.  Add wine and bring to a boil, scraping up any brown bits on the bottom of the pot.  Cook until reduced by half, 4-5 minutes.
  4. Return beef to the pot.  Add the chicken stock and water.  Bring to a boil, reduce heat to low and simmer, covered for 1 hour, stirring occasionally.
  5. After 1 hour add the barley to the pot and continue to cook, covered, for 30 - 40 minutes, or until barley is tender.  Add frozen peas for the last 2-3 minutes of cooking.  Turn off heat, stir in parsley and serve.
3.2.2802

Filed Under: Soup Tagged With: barley, beef, comfort food, dinner, soup, stew

Stuffed Mushrooms

November 23, 2009 by Susan

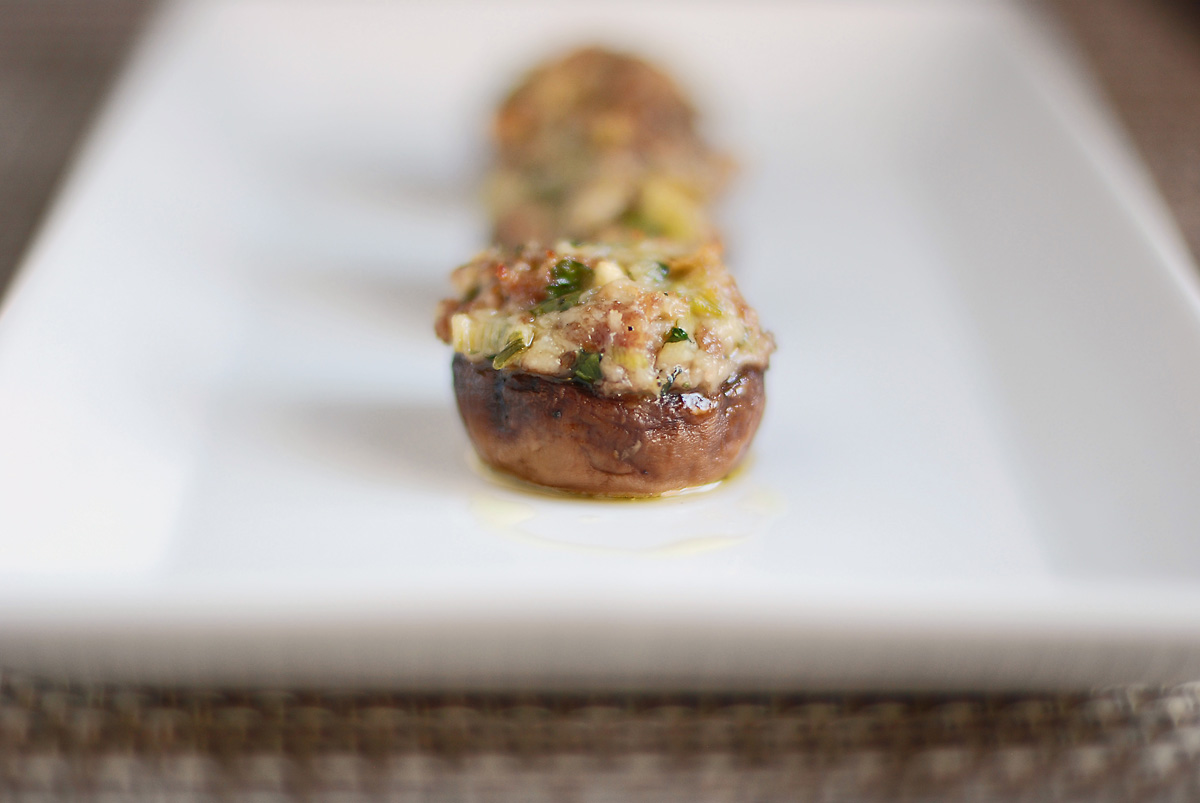
LineupR

I can hardly believe Thanksgiving is here already!  Shocking how time flies; one minute you are applying sunscreen, then next you are planning Thanksgiving dinner.  Sort of.  Anyway, I’ve got myself a new favorite side dish, one that would be perfect on any Thanksgiving table.  Stuffed mushrooms!

One word sufficiently describes these babies.  Superb.  Truly, they are delicious.  My fiance actually rolled his eyes back into his head during his first bite.  They are that good.

I saw Ina make these the other day and just had to try them.  She never disappoints!  I made a few slight changes to her recipe (added thyme, decreased amount of mascarpone).  Very yummy and very hearty.  A few big stuffed mushrooms can hold their own for a light lunch, for sure.

One of my favorite things about these mushrooms is that you can make them ahead.  Stuff them, put them in a baking dish, cover and keep in the fridge until ready to bake.  Or, store the filling in the fridge and just stuff the mushrooms as needed and pop in the oven.  Works really well during the week when you are short on time and energy and need just a little something to go with that piece of chicken or steak.

If you think your turkey can stand not being the center of attention this Thanksgiving, go ahead and give these mushrooms a try.  You won’t be disappointed.

Here’s what you will need to make approximately 25 medium/large stuffed mushrooms…

Recipe

25 medium/large white mushrooms, cleaned

3/4 pound sausage (remove from casing)

4-5 scallions, chopped

2 large cloves garlic, minced

2/3 cup panko (bread crumbs)

3 oz mascarpone (roughly 1/3 of a container)

1/3 cup parmigiano reggiano

1/2 cup chopped parsley

1 tbsp chopped thyme

2.5 tbsp marsala

3 tbsp olive oil

salt & pepper

Method

Preheat oven to 375 degrees.  Remove stems from mushrooms and reserve.  Clean mushroom caps with a damp paper towel, put in a large bowl.  Add marsala and 3 tbsp olive oil and mix to coat all mushrooms.  Put aside.

In a large skillet add a few tablespoons of olive oil, when hot add sausage and cook until just browned, breaking up with the back of a wooden spoon.  Meanwhile, chop mushroom stems and then add to the sausage.  Add scallions, garlic and panko and thyme.  Mix to combine and cook for about 5-7 minutes.  Turn off the heat, add mascarpone, parmigiano cheese, parsley and salt & pepper to taste.  Mix well until the mascarpone has fully melted into the sausage mixture.  Allow to cool slightly.

Now comes the time to stuff these guys.  Be careful, the mushrooms will be somewhat slippery to handle due to the marsala and olive oil.  Just take your time.  Stuff each mushroom well, mounding the tops with the delicious filling.  Pack the filling down slightly.  Place each stuffed mushroom in the baking dish.  Pop in the oven, uncovered, and bake for approximately 40 minutes.  As an added touch, I sometimes like to turn the broiler on for a minute or two towards the end of the cooking time.  This helps to brown the tops nicely, creating a bit of a an extra crunch on top.  If you do this, do not leave the stove, watch it carefully.  One or two minutes is enough, you don’t want to burn them!

Have I mentioned how delicious these are?

HeadOfLineR


Stuffed Mushrooms
 
Print
Author: Feasts And Fotos
Ingredients
  • 25 medium/large white mushrooms, cleaned
  • ¾ pound sausage (remove from casing)
  • 4-5 scallions, chopped
  • 2 large cloves garlic, minced
  • ⅔ cup panko (bread crumbs)
  • 3 oz mascarpone (roughly ⅓ of a container)
  • ⅓ cup parmigiano reggiano
  • ½ cup chopped parsley
  • 1 tbsp chopped thyme
  • 2.5 tbsp marsala
  • 3 tbsp olive oil
  • salt & pepper
Method
  1. Preheat oven to 375 degrees.  Remove stems from mushrooms and reserve.  Clean mushroom caps with a damp paper towel, put in a large bowl.  Add marsala and 3 tbsp olive oil and mix to coat all mushrooms.  Put aside.
  2. In a large skillet add a few tablespoons of olive oil, when hot add sausage and cook until just browned, breaking up with the back of a wooden spoon.  Meanwhile, chop mushroom stems and then add to the sausage.  Add scallions, garlic and panko and thyme.  Mix to combine and cook for about 5-7 minutes.  Turn off the heat, add mascarpone, parmigiano cheese, parsley and salt & pepper to taste.  Mix well until the mascarpone has fully melted into the sausage mixture.  Allow to cool slightly.
  3. Now comes the time to stuff these guys.  Be careful, the mushrooms will be somewhat slippery to handle due to the marsala and olive oil.  Just take your time.  Stuff each mushroom well, mounding the tops with the delicious filling.  Pack the filling down slightly.  Place each stuffed mushroom in the baking dish.  Pop in the oven, uncovered, and bake for approximately 40 minutes.  As an added touch, I sometimes like to turn the broiler on for a minute or two towards the end of the cooking time.  This helps to brown the tops nicely, creating a bit of a an extra crunch on top.  If you do this, do not leave the stove, watch it carefully.  One or two minutes is enough, you don't want to burn them!
3.2.2802

Filed Under: Sides and Sauces Tagged With: comfort food, mushrooms, sausage, side dish, stuffed

Stuffed Cabbage

October 6, 2009 by Susan

StuffedCabbageR

Now that there is a slight chill back in the air I immediately start thinking of comfort food dishes.  This stuffed cabbage recipe certainly fits the bill.  I made it a few times last year and have now arrived at the perfect combination of ingredients for this recipe.  Perfect for me, that is!  Not sure how much weight that carries considering I’m Italian and this is a Polish/Hungarian dish.  On that note, I will mention that my fiance is Ukranian and absolutely loves them!

Rolling up the leaves does require some time.  I happen to love doing it, I find it fun.  As you will see from the recipe below, this makes roughly 20 rolls!  Since it’s just the two of us, we can eat this for dinner twice during the week as well as bring them for lunch almost everyday.  So that’s what we’ve been doing.  And no, we’re not sick of them yet!

To be honest, they get better as the days go on.

Here’s what you will need to serve 6-8 people (roughly 20 cabbage rolls)…

Recipe

1 large dutch oven

Savoy Cabbage – 2 medium or large heads

Meat Mixture:

2 lbs chop meat (sirloin & pork)

1 cup cooked brown rice

1 large yellow onion, finely chopped

1 egg

1/4 cup parsley

3 cloves garlic, finely chopped

salt & pepper

Sauce

2 28 oz cans whole, peeled tomatoes

2 cans low-sodium tomato juice (soda can size)

2 large spanish onions, sliced

>water

salt & pepper

Preheat oven to 325 degrees.

Method

The cabbage:  There are 2 ways you can tackle the head of cabbage.  First option is to remove the core (I find this difficult to do) and place the entire head of cabbage in a large pot of boiling water.  As the leaves soften they will start to break away from the head.  With tongs gently remove each leaf, one at a time, as it softens.  Lay on a tray to cool.

The other method is to turn the cabbage upside down and gently cut eat piece off near the core.  Once you slice through the first leaf, gently pull the leaf away from the head of cabbage.  Place each leaf in a large pot of boiling water until softened.  Lay on a tray to cool.

For the sauce, pour the whole, peeled tomatoes into a food processor and pulse until broken up.  Pour into a bowl and add the cans of tomato juice.  Add salt & pepper to taste.

To make the meat mixture, simply add the brown rice, onions, garlic, parsley and 1-2 ladles of the sauce to the chop meat and mix well.  I like to use a combination of sirloin and pork for the filling.  You can always add veal to this as well.

Now for the fun part.  Assembling!  Ok, lay one cabbage leaf down and cut the end portion of the core out.  Place a small palmful of meat onto the leaf and roll.  I like to fold the sides in first and then roll up.  It’s best to use all the large leaves from the cabbage, it gets difficult to roll the smaller ones.  That’s why I suggest to buy 2 heads of cabbage.

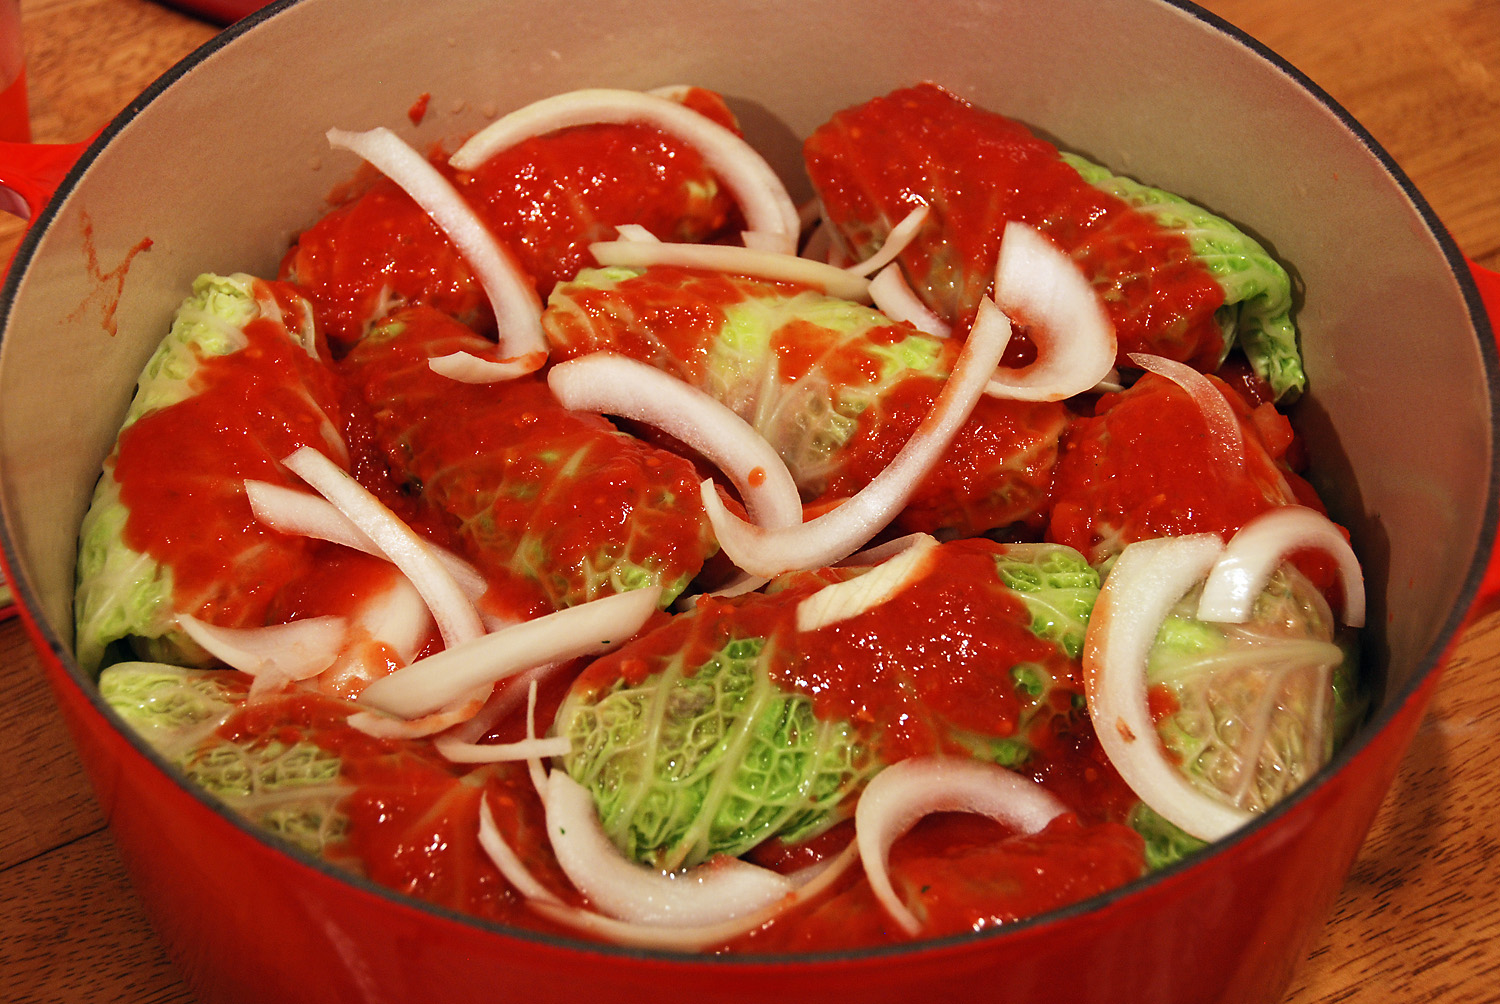
In the bottom of a large dutch oven place one layer of flat cabbage leaves, overlapping slightly.  Spread some sliced onions over the cabbage leaves.  Lay each stuffed cabbage roll, seam side down, in a single layer, on top of the onions.  Pour a few ladles of sauce over the cabbages.  Place another layer of sliced onions.  Now for the 2nd layer, go ahead and place the rolled up cabbages in another single layer, pour a few ladles of sauce over the cabbages, now some more onions.  You get the picture.  Continue until all your stuffed cabbages are in the pot.  I usually get 3 layers in my big pot.  This is what my 2nd layer looked like…

StuffedCabbagePot

Let me take a moment here to state how much I love this red Le Creuset pot (above).  Love.  Cooks soups, stews and stuffed cabbage like a dream.  Cleans beautifully.  Love.  Ok, moving on…

Pour any and all remaining sauce over the top of the last layer.  If all cabbages are not submerged in liquid, add water to the pot until they are submerged.  If you have any leftover cabbage, you can thinly slice (shred) some leaves and place on top of the rolls.  Place a lid on the pot and put in the oven.  Bake for roughly 2.5 to 3 hours.

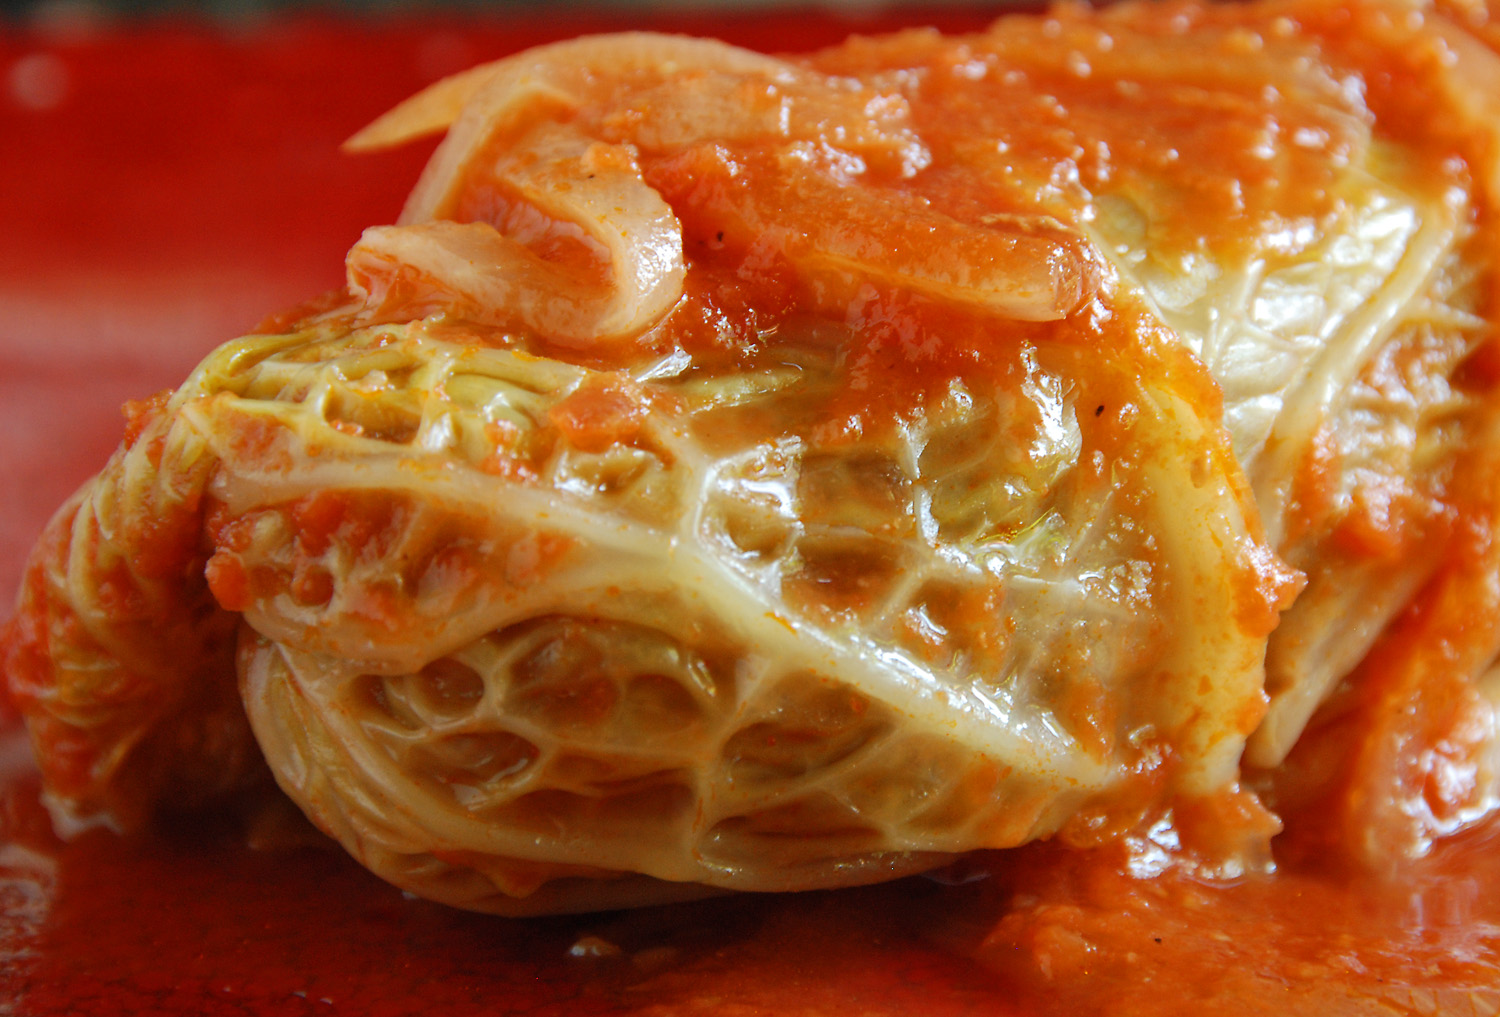
Low.  And.  Slow.   Then, you will be rewarded with this…

StuffedCabbageWholeR


Stuffed Cabbage
 
Print
Author: Feasts And Fotos
Ingredients
  • 1 large dutch oven
  • Savoy Cabbage - 2 medium or large heads
  • Meat Mixture:
  • 2 lbs chop meat (sirloin & pork)
  • 1 cup cooked brown rice
  • 1 large yellow onion, finely chopped
  • 1 egg
  • ¼ cup parsley
  • 3 cloves garlic, finely chopped
  • salt & pepper
  • Sauce
  • 2 28 oz cans whole, peeled tomatoes
  • 2 cans low-sodium tomato juice (soda can size)
  • 2 large spanish onions, sliced
  • >water
  • salt & pepper
  • Preheat oven to 325 degrees.
Method
  1. The cabbage: There are 2 ways you can tackle the head of cabbage. First option is to remove the core (I find this difficult to do) and place the entire head of cabbage in a large pot of boiling water. As the leaves soften they will start to break away from the head. With tongs gently remove each leaf, one at a time, as it softens. Lay on a tray to cool.
  2. The other method is to turn the cabbage upside down and gently cut eat piece off near the core. Once you slice through the first leaf, gently pull the leaf away from the head of cabbage. Place each leaf in a large pot of boiling water until softened. Lay on a tray to cool.
  3. For the sauce, pour the whole, peeled tomatoes into a food processor and pulse until broken up. Pour into a bowl and add the cans of tomato juice. Add salt & pepper to taste.
  4. To make the meat mixture, simply add the brown rice, onions, garlic, parsley and 1-2 ladles of the sauce to the chop meat and mix well. I like to use a combination of sirloin and pork for the filling. You can always add veal to this as well.
  5. Lay one cabbage leaf down and cut the end portion of the core out. Place a small palmful of meat onto the leaf and roll. I like to fold the sides in first and then roll up. It's best to use all the large leaves from the cabbage, it gets difficult to roll the smaller ones. That's why I suggest to buy 2 heads of cabbage.
  6. In the bottom of a large dutch oven place one layer of flat cabbage leaves, overlapping slightly. Spread some sliced onions over the cabbage leaves. Lay each stuffed cabbage roll, seam side down, in a single layer, on top of the onions. Pour a few ladles of sauce over the cabbages. Place another layer of sliced onions. Now for the 2nd layer, go ahead and place the rolled up cabbages in another single layer, pour a few ladles of sauce over the cabbages, now some more onions.
  7. Pour any and all remaining sauce over the top of the last layer. If all cabbages are not submerged in liquid, add water to the pot until they are submerged. If you have any leftover cabbage, you can thinly slice (shred) some leaves and place on top of the rolls. Place a lid on the pot and put in the oven. Bake for roughly 2.5 to 3 hours.
3.2.2802

Filed Under: Main Dishes Tagged With: cabbage, comfort food, rolls, stuffed

Hello and welcome to Feasts and Fotos!

Archives

Categories

Copyright © 2025 · Foodie Pro Theme by Shay Bocks · Built on the Genesis Framework · Powered by WordPress